
RumptyCloud offers managed Postgres databases. In this guide we will create your database, obtain connection credentials, and connect using both the command line and a GUI tool.
What you will need
Before you begin, make sure you have:
- A RumptyCloud account and workspace
- PostgreSQL CLI (
psql) installed — download here - Or a database GUI tool like pgAdmin or DBeaver installed
1. Create a database
Sign in to the RumptyCloud console, select your workspace, open Databases, and select Create database.
-
Select Postgres as the database engine.
-
Choose the database version (e.g., PostgreSQL 16).
-
Select a size based on your needs:
Size Price vCPU Memory Storage Playground Free 1 vCPU 256 MB 2 GB Seed NGN 2,092.50/mo 1 vCPU 512 MB 5 GB Sprout NGN 4,158.00/mo 1 vCPU 1 GB 15 GB Bloom NGN 8,302.50/mo 2 vCPU 2 GB 30 GB -
Choose a Zone (default region is olas-closet).
-
Name your database (e.g.,
rumpty-db). -
Enable the Public connection endpoint : this allows you to connect from your local machine.
2. Obtaining Your Credentials
Once the database is created you will be redirected to the database page.
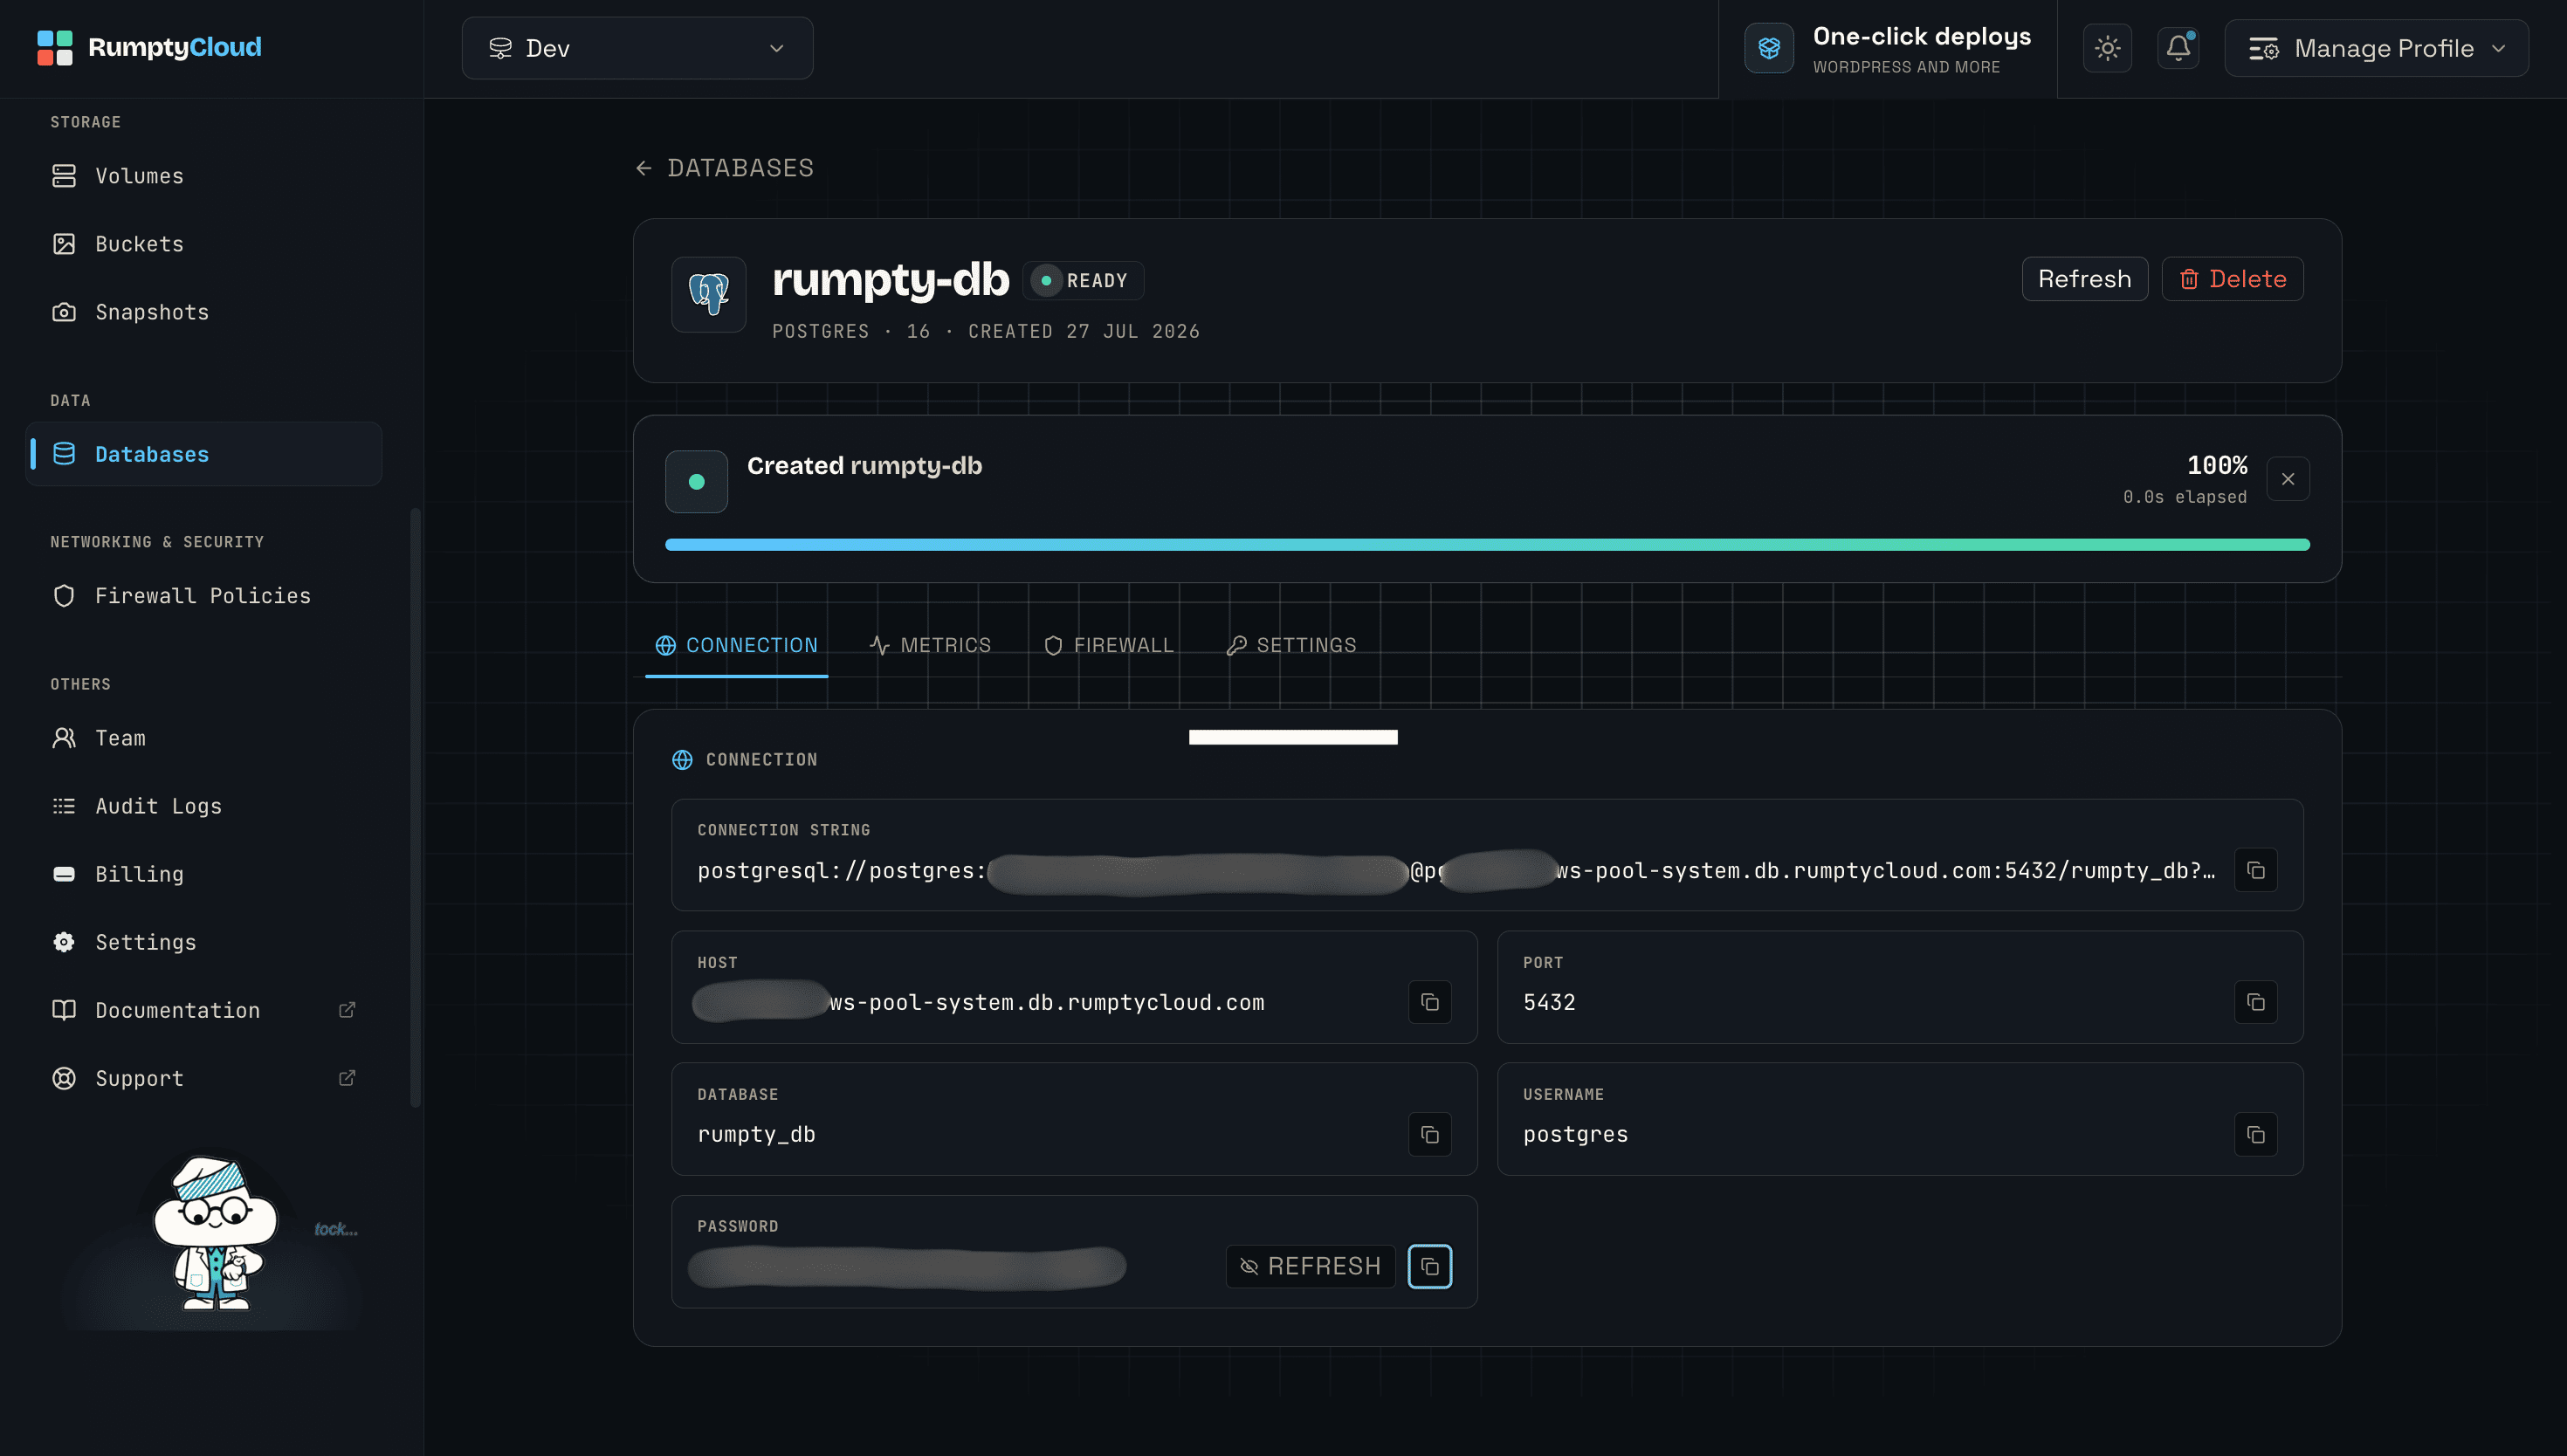
- In the database overview page, locate the Connection section.
- Copy either:
- The Full Connection String (includes everything you need)
- The Password (to use with a different connection string )
Note: Passwords are set when the database is provisioned and cannot currently be rotated from the console. Store your credentials securely.
3. Connecting to Your Database
Prerequisite: PostgreSQL client tools installed on your machine.
Option A: Connect Using psql (CLI)
Using the full connection string copied earlier:
psql "postgresql://username:password@host:5432/database"Or connect interactively:
psql -h your-host -U your-username -d your-database -p 5432You’ll be prompted for the password. Paste it when prompted.
Example: create a table and write test data
Once you’re connected, here’s a quick way to confirm everything works end-to-end; Create a table, insert a batch of rows, and check the result:
psql "postgresql://username:password@host:5432/database?sslmode=require" \
  -c "CREATE TABLE IF NOT EXISTS metrics_write_test (
        id bigserial PRIMARY KEY,
        batch_id text NOT NULL,
        payload text NOT NULL,
        n integer NOT NULL,
        created_at timestamptz NOT NULL DEFAULT now());" \
  -c "INSERT INTO metrics_write_test (batch_id, payload, n)
      SELECT
        'batch-' || to_char(now(), 'YYYYMMDDHH24MISS'),
        repeat(md5(random()::text), 20),
        gs
      FROM generate_series(1, 1000) AS gs;" \
  -c "SELECT
        count(*) AS total_rows,
        pg_size_pretty(pg_total_relation_size('metrics_write_test')) AS table_size
      FROM metrics_write_test;"
Replace username, password, host, and database with the values from your Connection section.
Here’s what each -c flag does- psql runs each one in order against the same connection:
- Creates a test table —
metrics_write_test, with an auto-incrementingid, abatch_idto group each run, apayloadtext column, anncounter, and acreated_attimestamp that defaults to now.IF NOT EXISTSmeans you can rerun this command safely without erroring if the table’s already there. - Inserts 1000 rows of sample data —
generate_series(1, 1000)produces a thousand row numbers, and for each one it inserts a row with a sharedbatch_id(timestamped, so each run is distinguishable), a random 640-characterpayload(20 repeats of an MD5 hash), and the row number asn. - Reports the results — counts the total rows in the table and prints the table’s total on-disk size in a human-readable format like
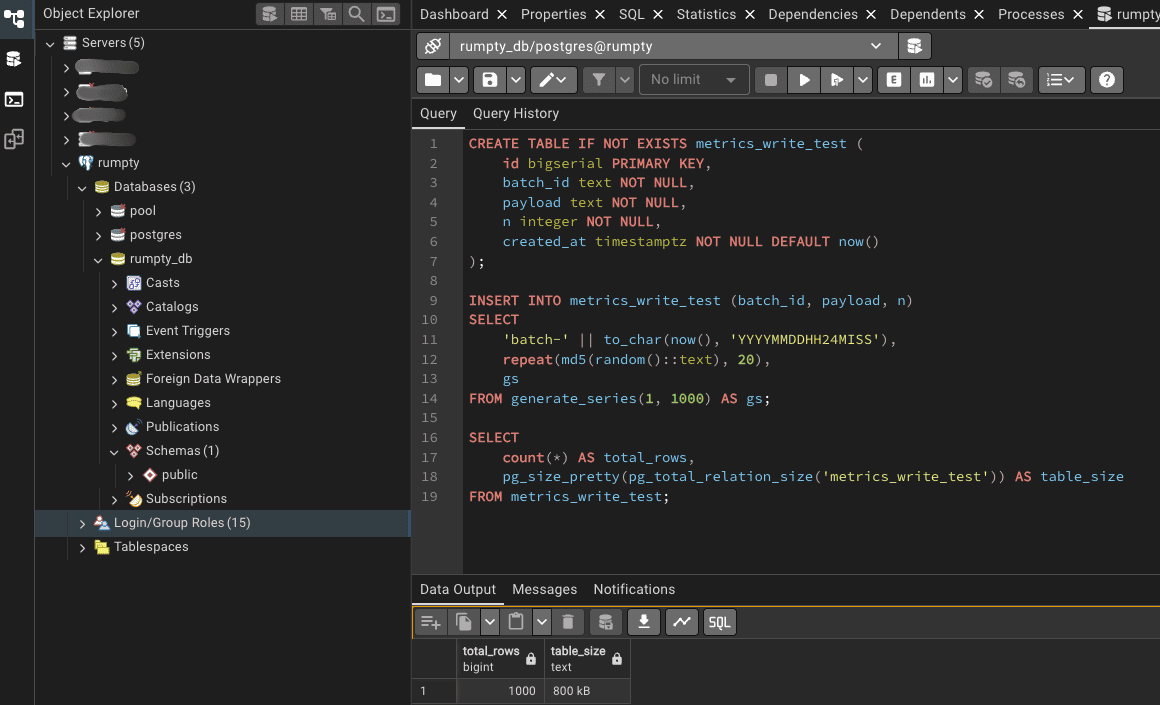
800 KB, so you can see the effect of the insert.
Option B: Connect Using pgAdmin (GUI tool)
- Open pgAdmin and click Add New Server.
- In the General tab:
- Name: RumptyCloud DB (or any name you prefer)
- In the Connection tab:
- Host name/address: Your database host
- Port: 5432
- Maintenance database: Your database name
- Username: Your database username
- Password: Click Save Password and enter your password
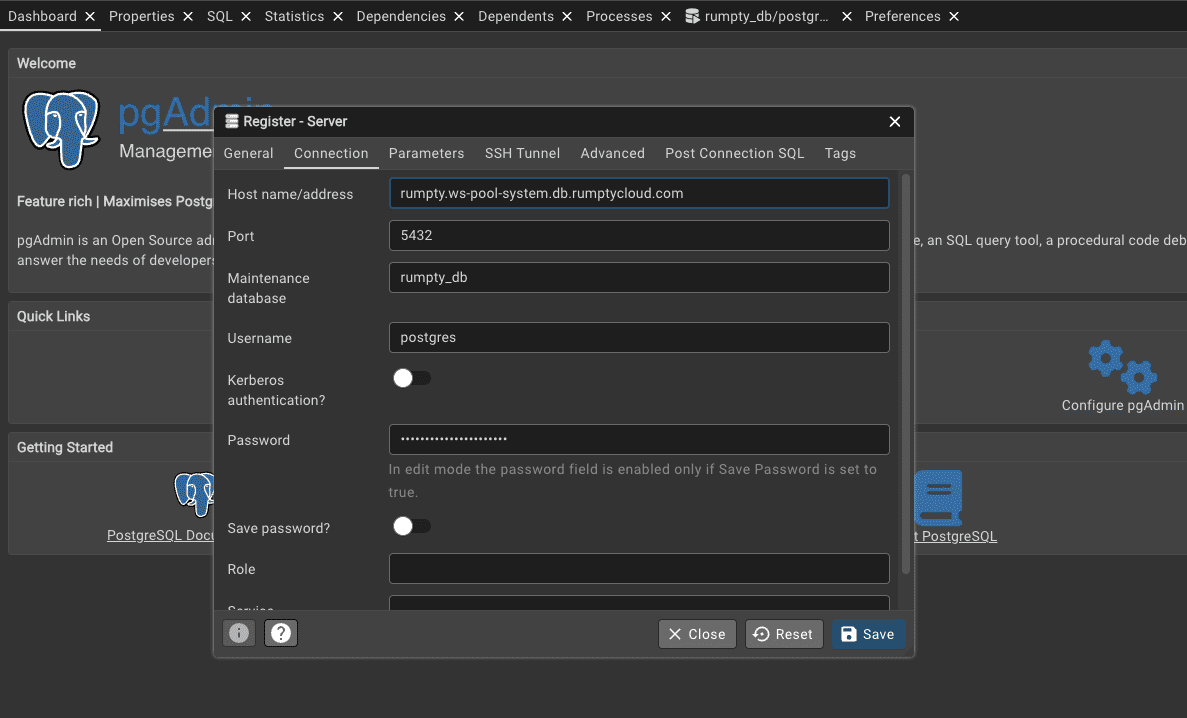
- Click Save to connect.
Example: create a table and write test data
Once connected, you can run the same test as the CLI example above directly from your GUI’s query editor:
- pgAdmin: right-click your database in the left panel - Query Tool
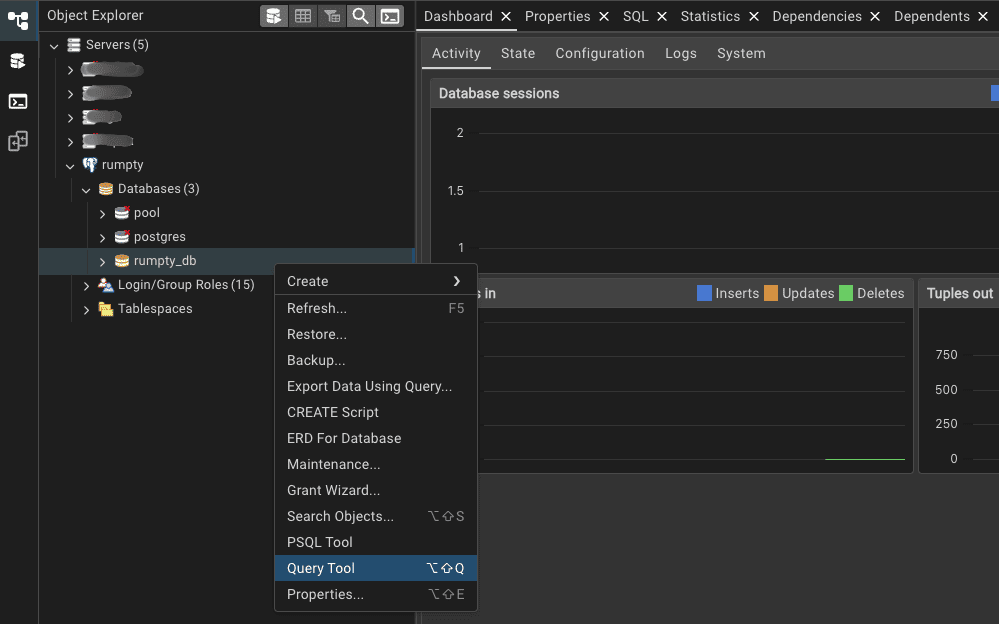
Paste and run the following:
CREATE TABLE IF NOT EXISTS metrics_write_test (
    id bigserial PRIMARY KEY,
    batch_id text NOT NULL,
    payload text NOT NULL,
    n integer NOT NULL,
    created_at timestamptz NOT NULL DEFAULT now()
);

INSERT INTO metrics_write_test (batch_id, payload, n)
SELECT
    'batch-' || to_char(now(), 'YYYYMMDDHH24MISS'),
    repeat(md5(random()::text), 20),
    gs
FROM generate_series(1, 1000) AS gs;

SELECT
    count(*) AS total_rows,
    pg_size_pretty(pg_total_relation_size('metrics_write_test')) AS table_size
FROM metrics_write_test;
In pgAdmin, run each statement individually with the Execute button (or all at once with Execute Script), and check the Data Output tab for results.
4. Monitor Your Database
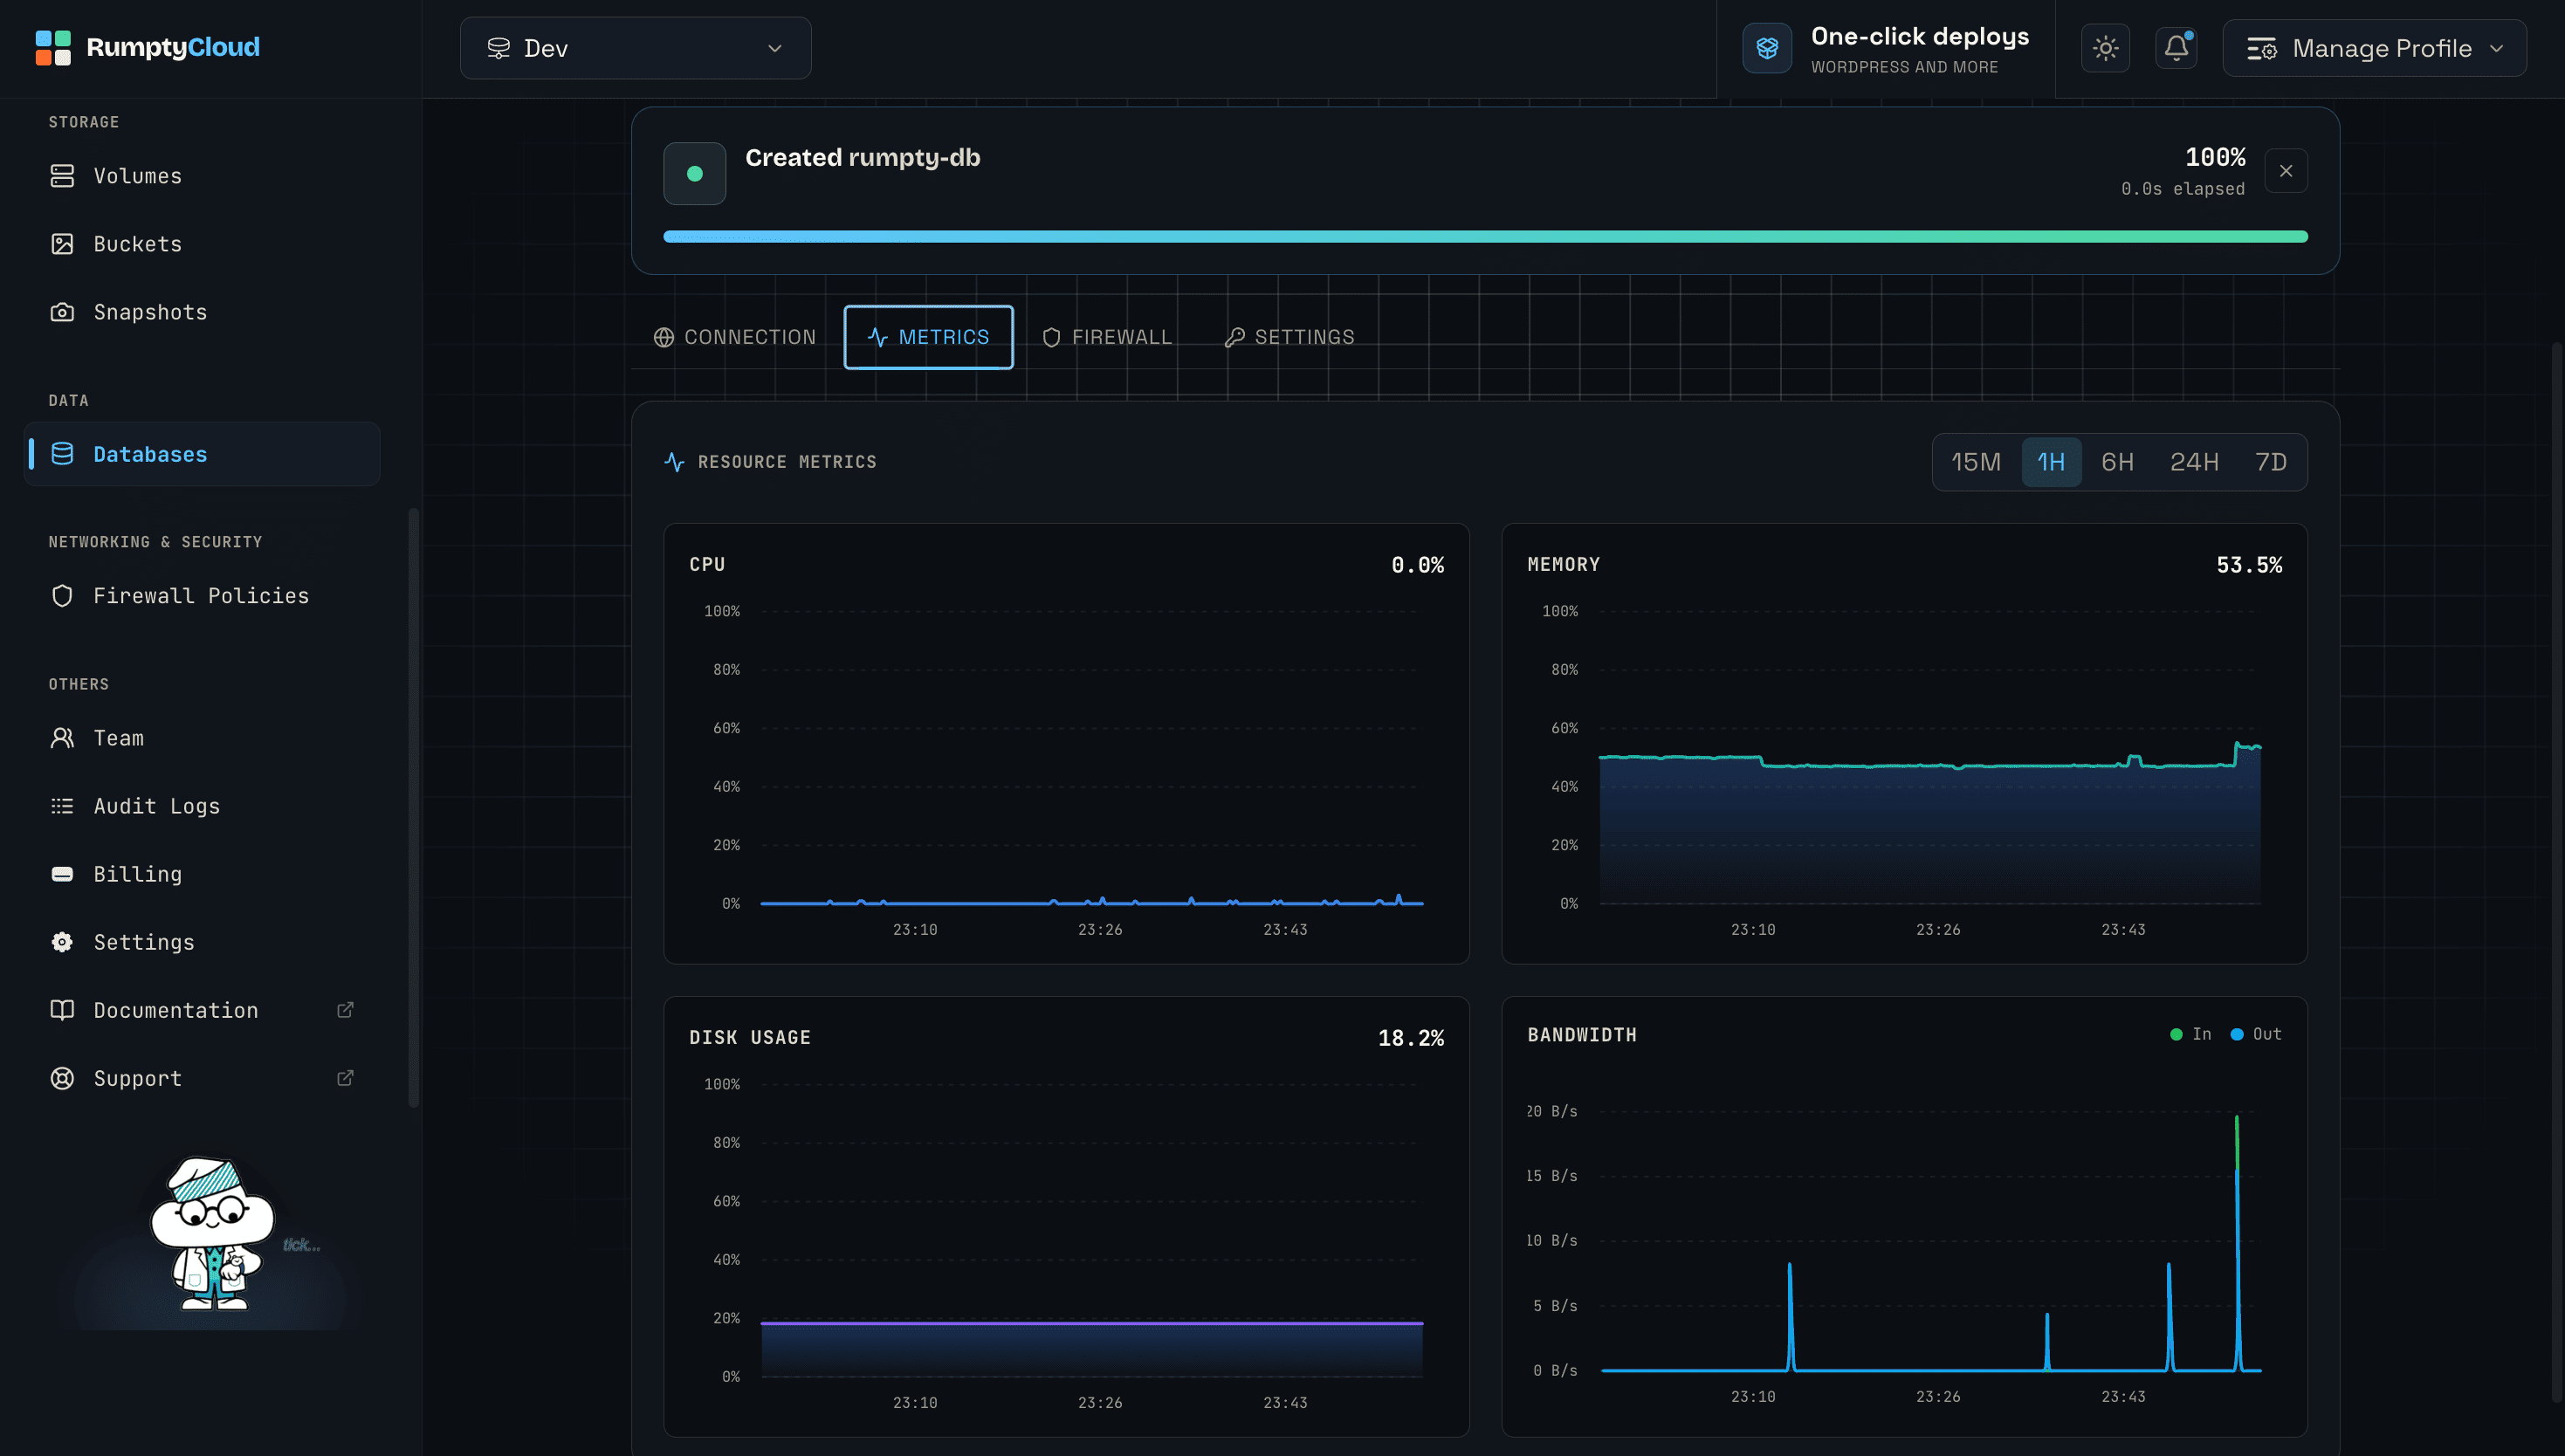
In the database overview page, scroll down to the Metrics section. Here you can track key performance indicators for your database, including:
- CPU Usage — Monitor processing load on your database instance
- Memory Usage — Track RAM consumption to identify potential bottlenecks
- Disk Usage — Keep an eye on storage consumption to avoid running out of space
- Bandwidth — Monitor network traffic in and out of your database
You can view metrics across different time ranges:
| Time Range | Best For |
|---|---|
| 15M | Real-time debugging and immediate issue detection |
| 1H | Short-term performance analysis |
| 6H | Half-day trends and usage patterns |
| 24H | Daily performance overview |
| 7D | Weekly trends and capacity planning |
Troubleshooting
| Problem | Fix |
|---|---|
SSL connection is required. Please specify SSL options. |
Enable SSL in your connection settings. Set SSL mode to require or verify-full in pgAdmin/DBeaver, or add ?sslmode=require to your connection string. |
could not connect to server: Connection timed out |
Ensure Public connection endpoint is enabled in your database settings. |
FATAL: password authentication failed for user "username" |
Double-check your username and password. Click Reveal in the console to copy the exact password. |
FATAL: database "database" does not exist |
The database name is incorrect. Check the exact database name in your connection string. |
SSL error: certificate verify failed |
Set SSL mode to require instead of verify-full to bypass certificate validation. |
FATAL: too many connections for role "username" |
Close idle connections or restart your application. Upgrade to a larger instance if needed. |
Conclusion
You’ve successfully created a managed Postgres database on RumptyCloud and connected to it using both the CLI and a GUI tool. You now have a database with:
- A fully managed Postgres instance
- Secure SSL-encrypted connections
- Public endpoint access from anywhere
- Connection credentials ready for your applications