
RumptyCloud gives you isolated Linux virtual machines/VPS for everything from quick experiments to long-running services. Each VM lives inside a workspace, joins its private network automatically, and is reachable over SSH through the Rumpty CLI. In this guide, we will create a VM from scratch, connect to it, and run your first commands on it.
What you will need
Before you begin, make sure you have:
- A RumptyCloud account and workspace
- A terminal on your local machine
- An SSH key pair (we will generate one if you don’t have it)
You can follow this guide using the free Ephemeral Trial plan.
1. Create your account and workspace
Open the sign-up page and:
- Choose a username, enter your email, and set a password (at least 10 characters).
- Accept the terms and select Create account.
- Open the verification link sent to your email to activate the account, then log in.
On your first login, RumptyCloud prompts you to create a workspace. A workspace is your unit of organization and isolation in Rumpty Cloud. Every resource you create lives inside a workspace, isolated from your other workspaces. Each workspace has its own members, roles, and billing, so you can separate projects, environments (staging vs. production), or clients cleanly, VMs, deployments, databases, volumes, and more live inside it. Enter a name (e.g. Dev Sandbox), add an optional description, and select Create workspace.
2. Add an SSH key
VMs use SSH keys instead of passwords, so the key you add here is injected into every new VM you create. If you don’t have a key pair yet, generate one in your terminal:
ssh-keygen -t ed25519 -C "rumpty"Then copy your public key:
cat ~/.ssh/id_ed25519.pubAdd it to RumptyCloud:
- Open Settings → SSH keys in your workspace sidebar.
- Enter a Key name (e.g.
MacBook Pro). - Paste your Public key and select Add key.
3. Create the VM
Go to Compute → Virtual Machines → Create VM and fill in the form. Each section is self-explanatory, so let’s walk through what you are choosing:
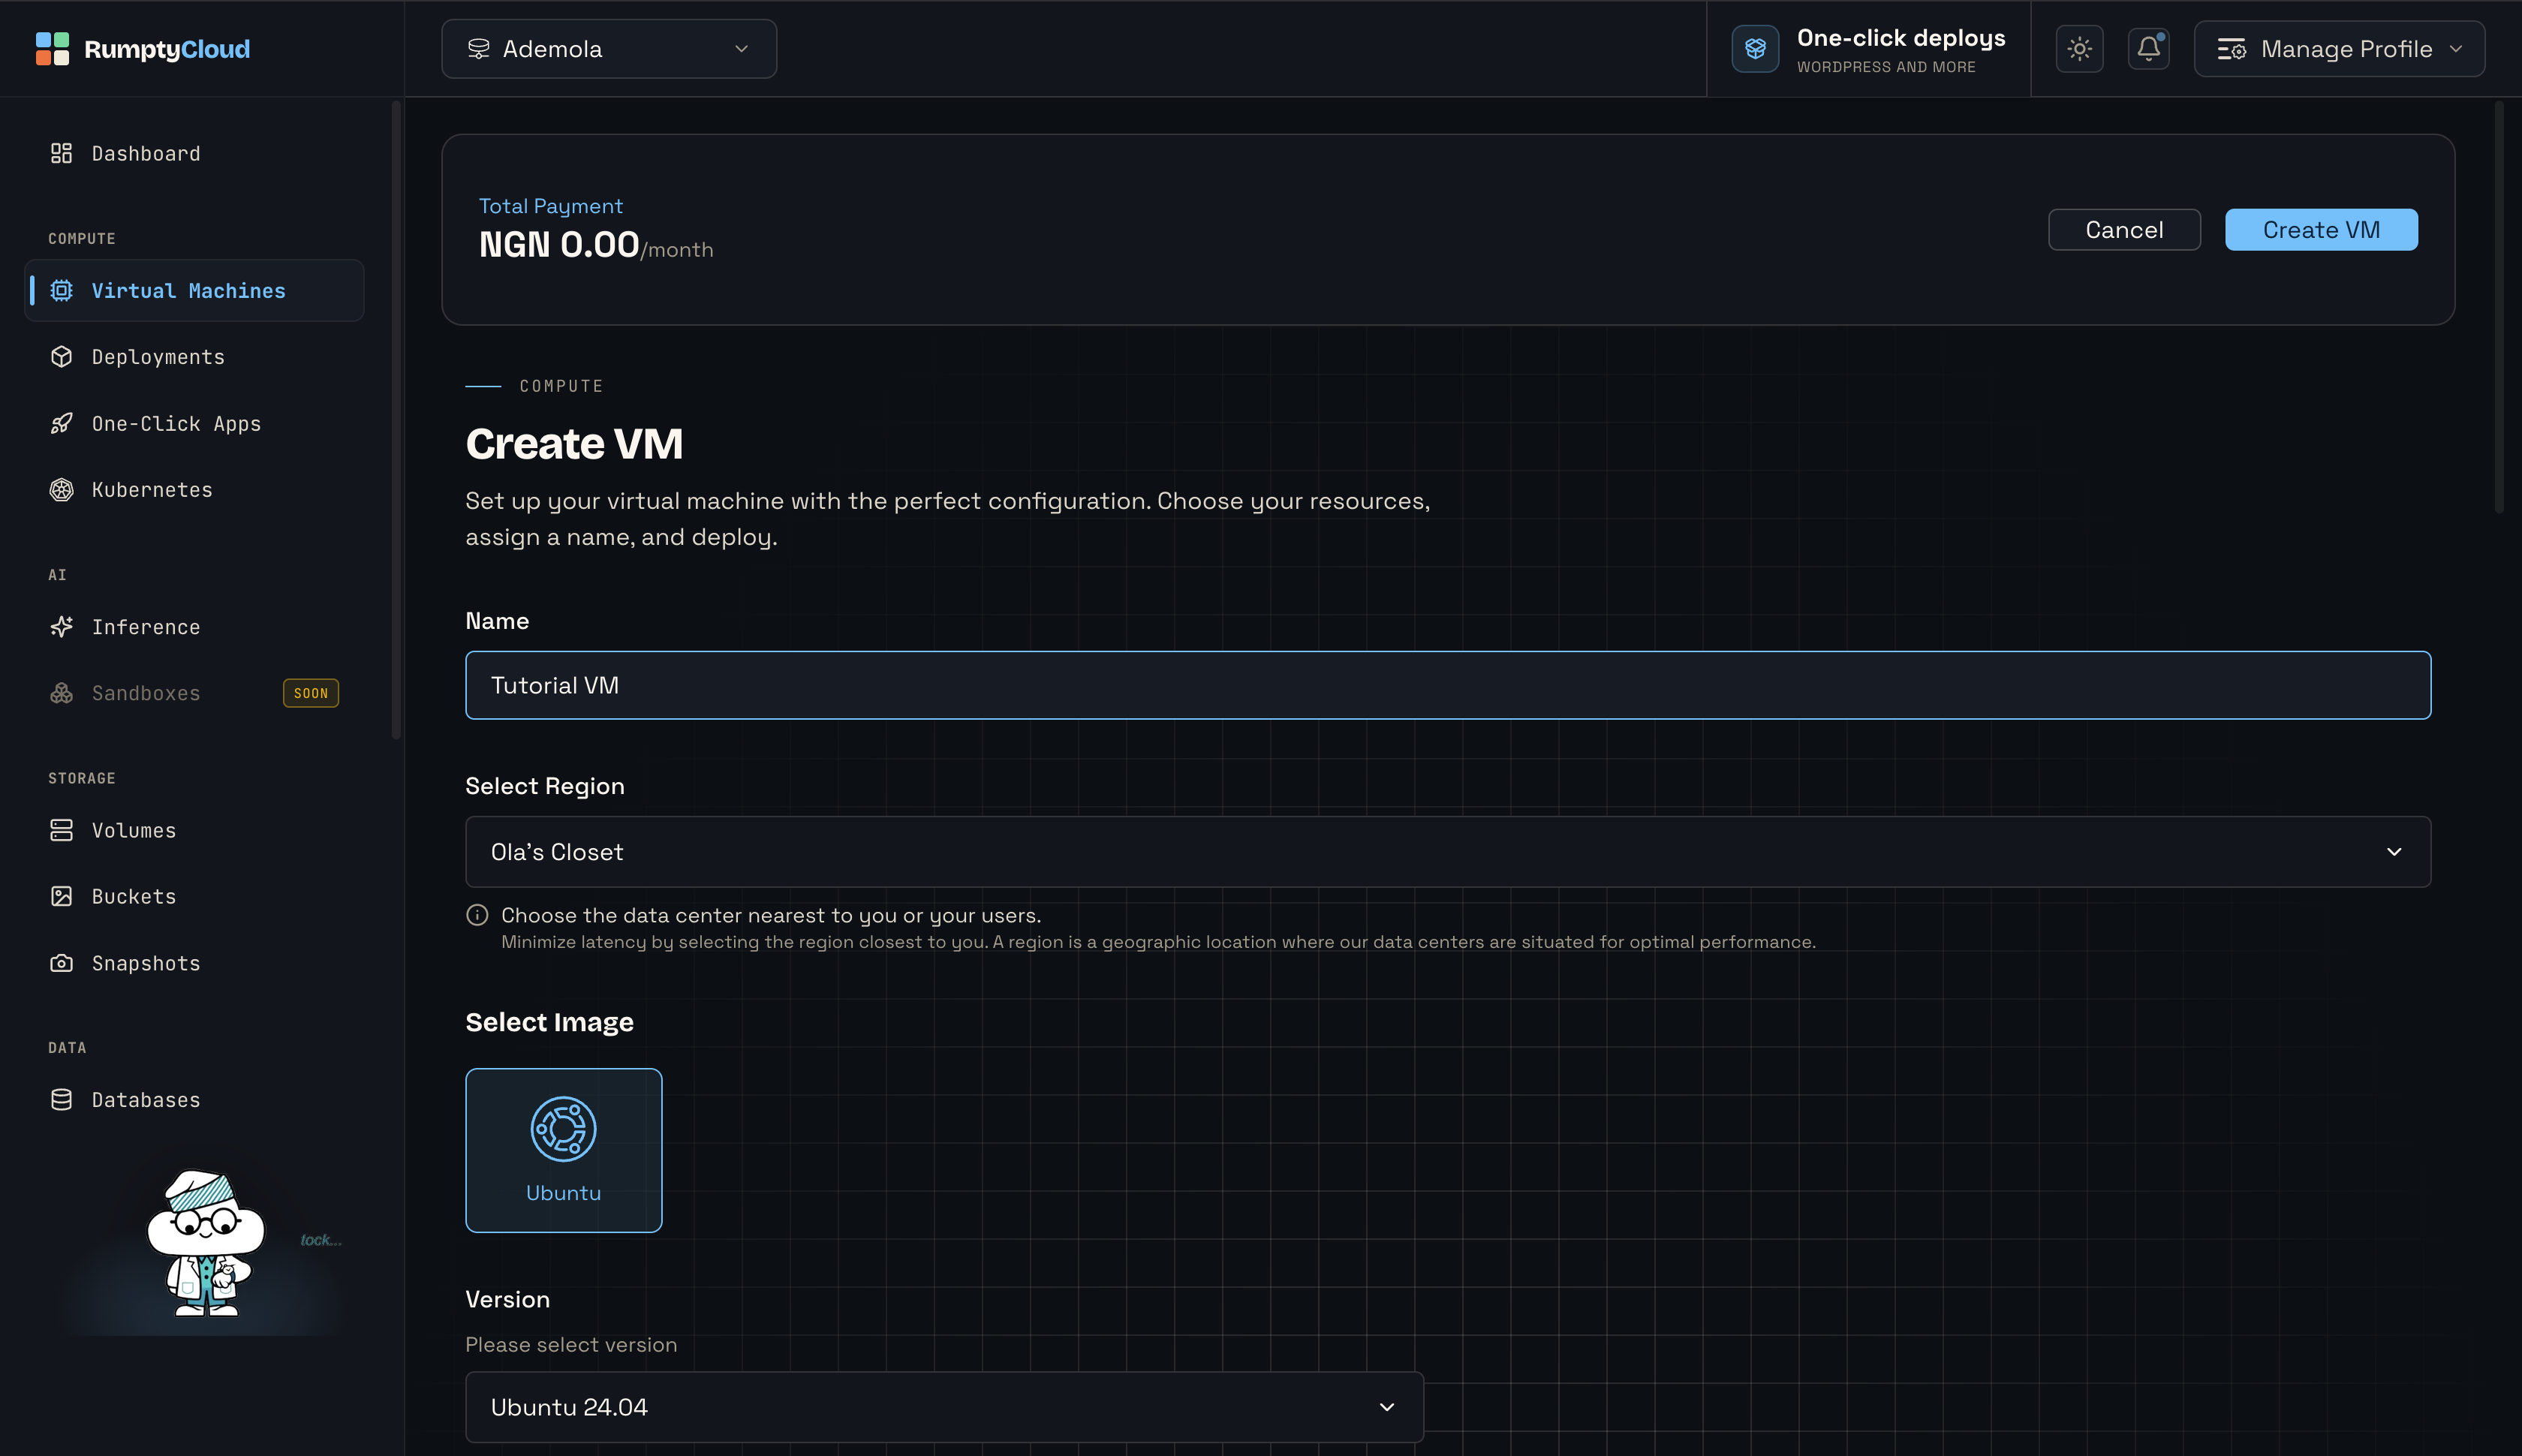
- Name — any name you like; it becomes the VM’s hostname.
- Region — the data center nearest to you or your users, to minimize latency.
- Image — an OS family, then a specific Version (e.g. Ubuntu 24.04).
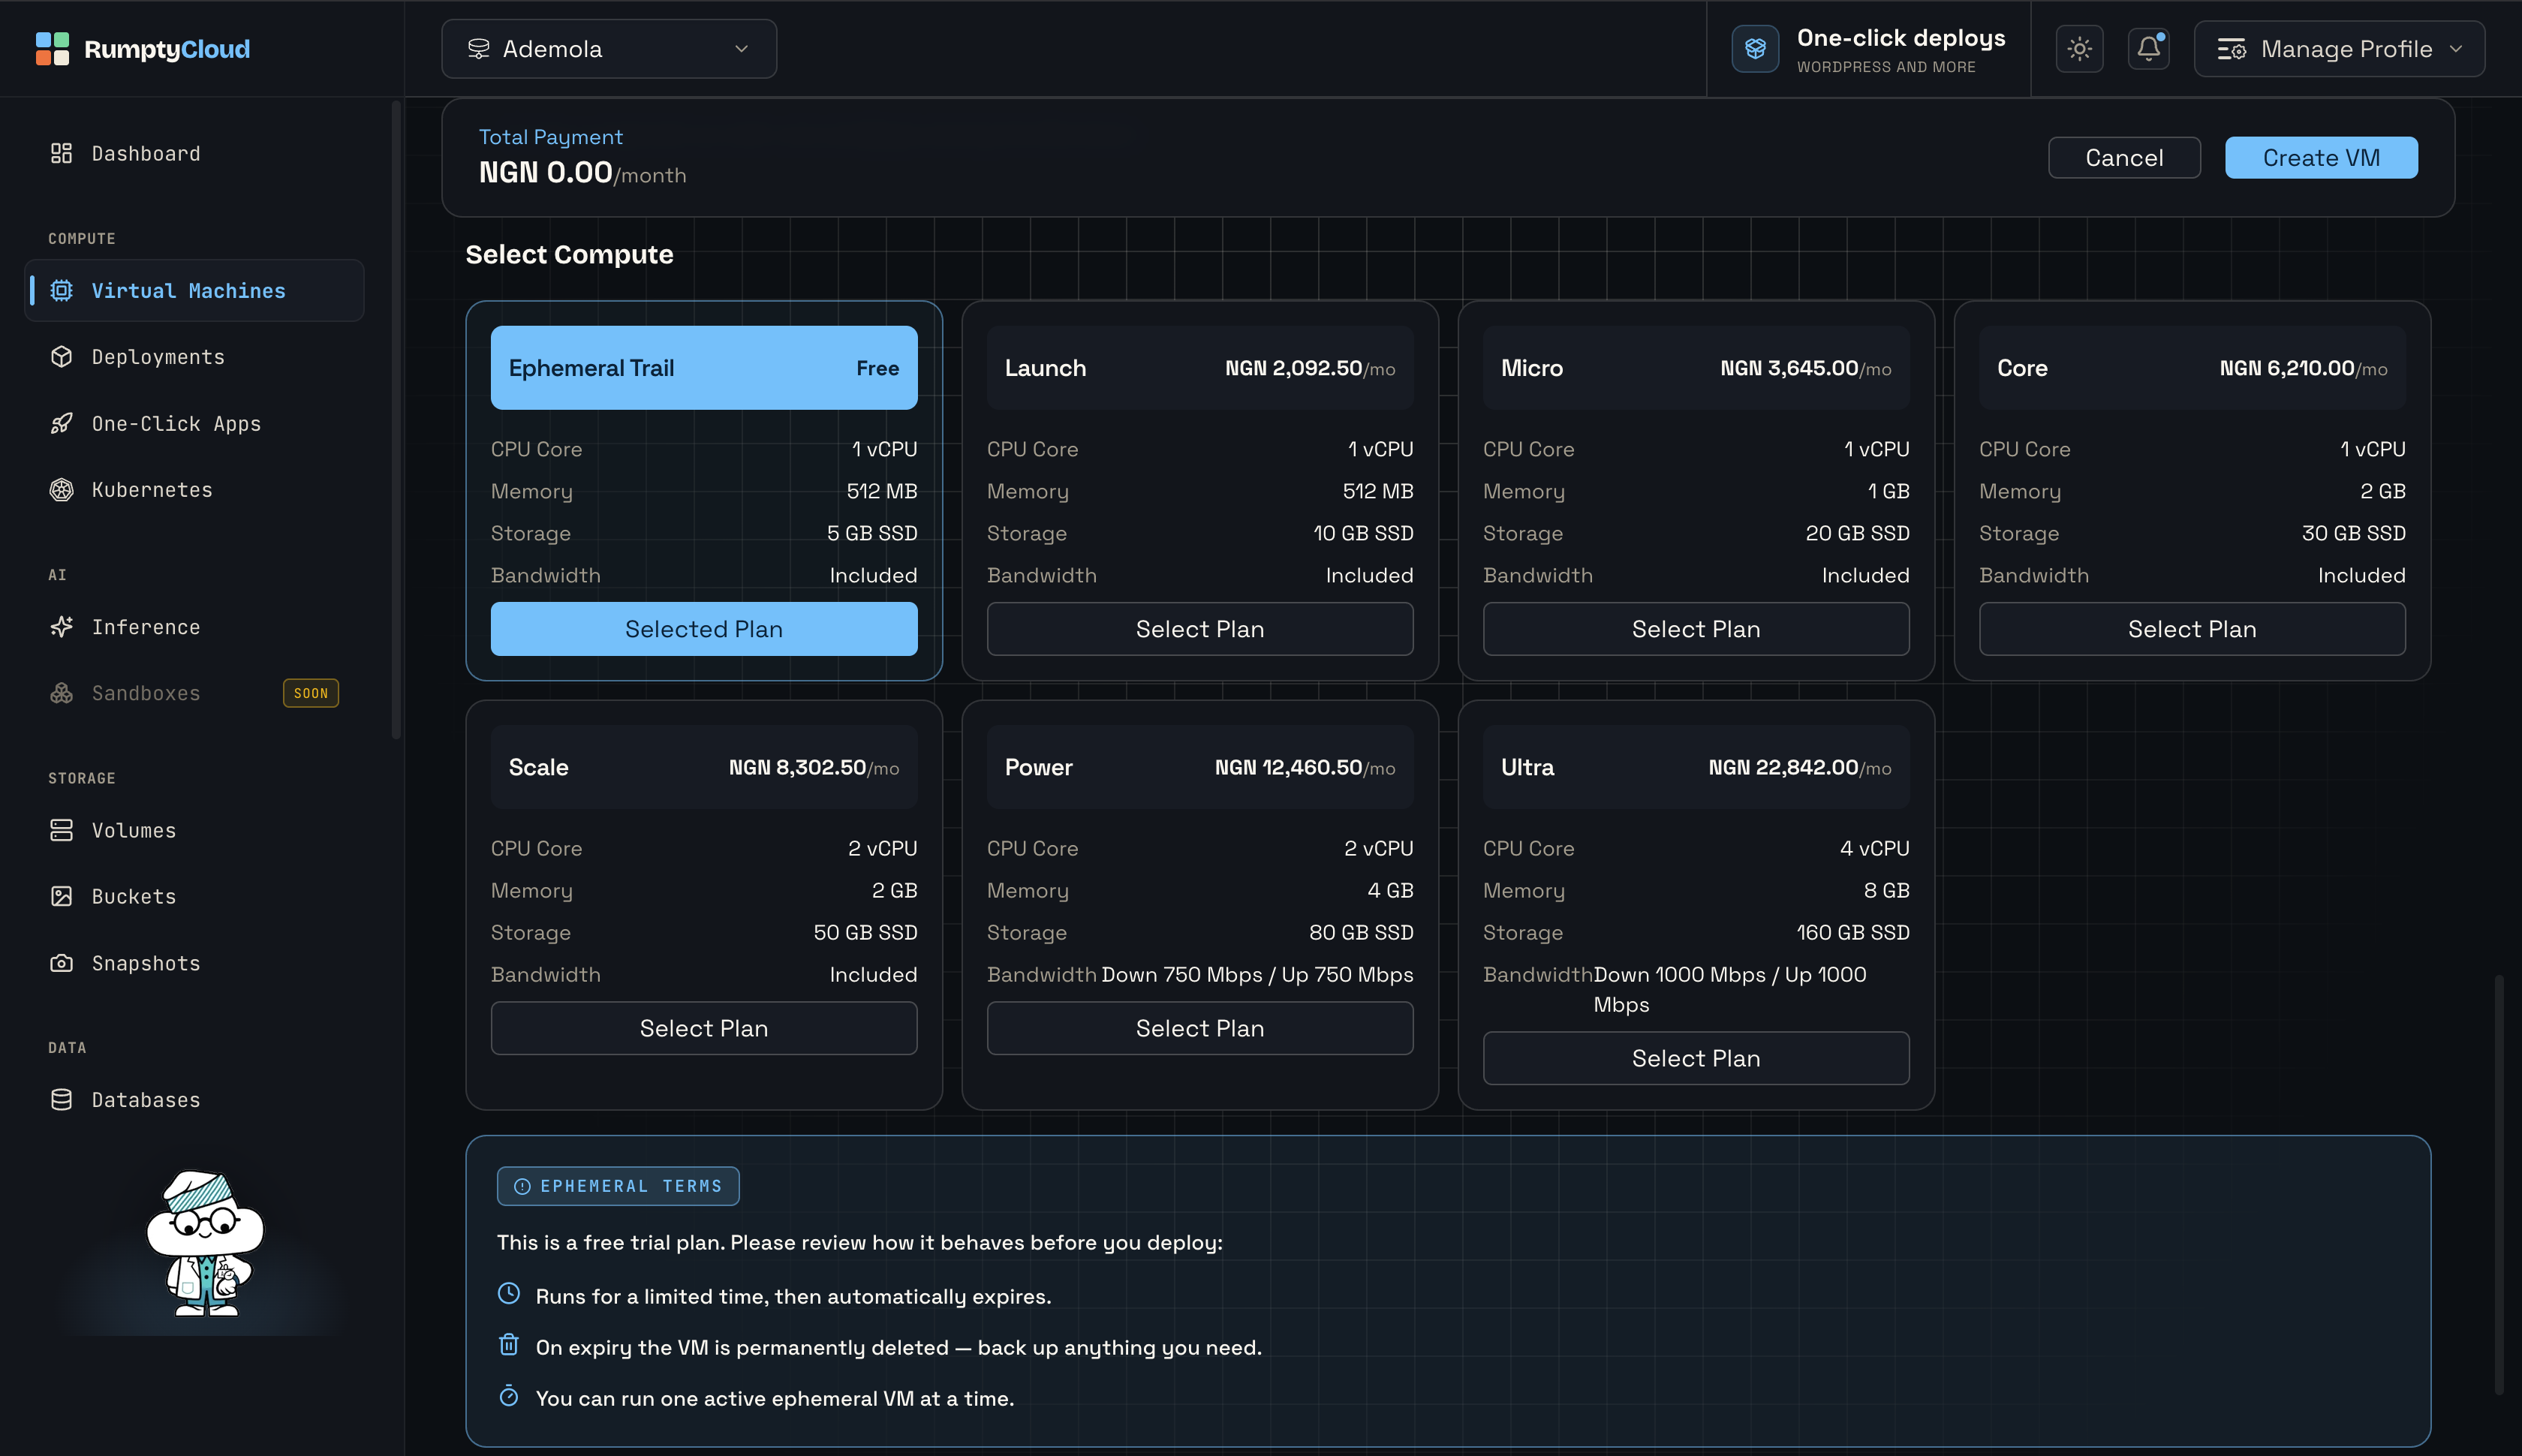
Next, select your Compute plan. The free Ephemeral Trial plan is ideal for following this guide — a full breakdown is in Choosing a plan:
Want extra storage? Attach an existing Volume or create a new one:
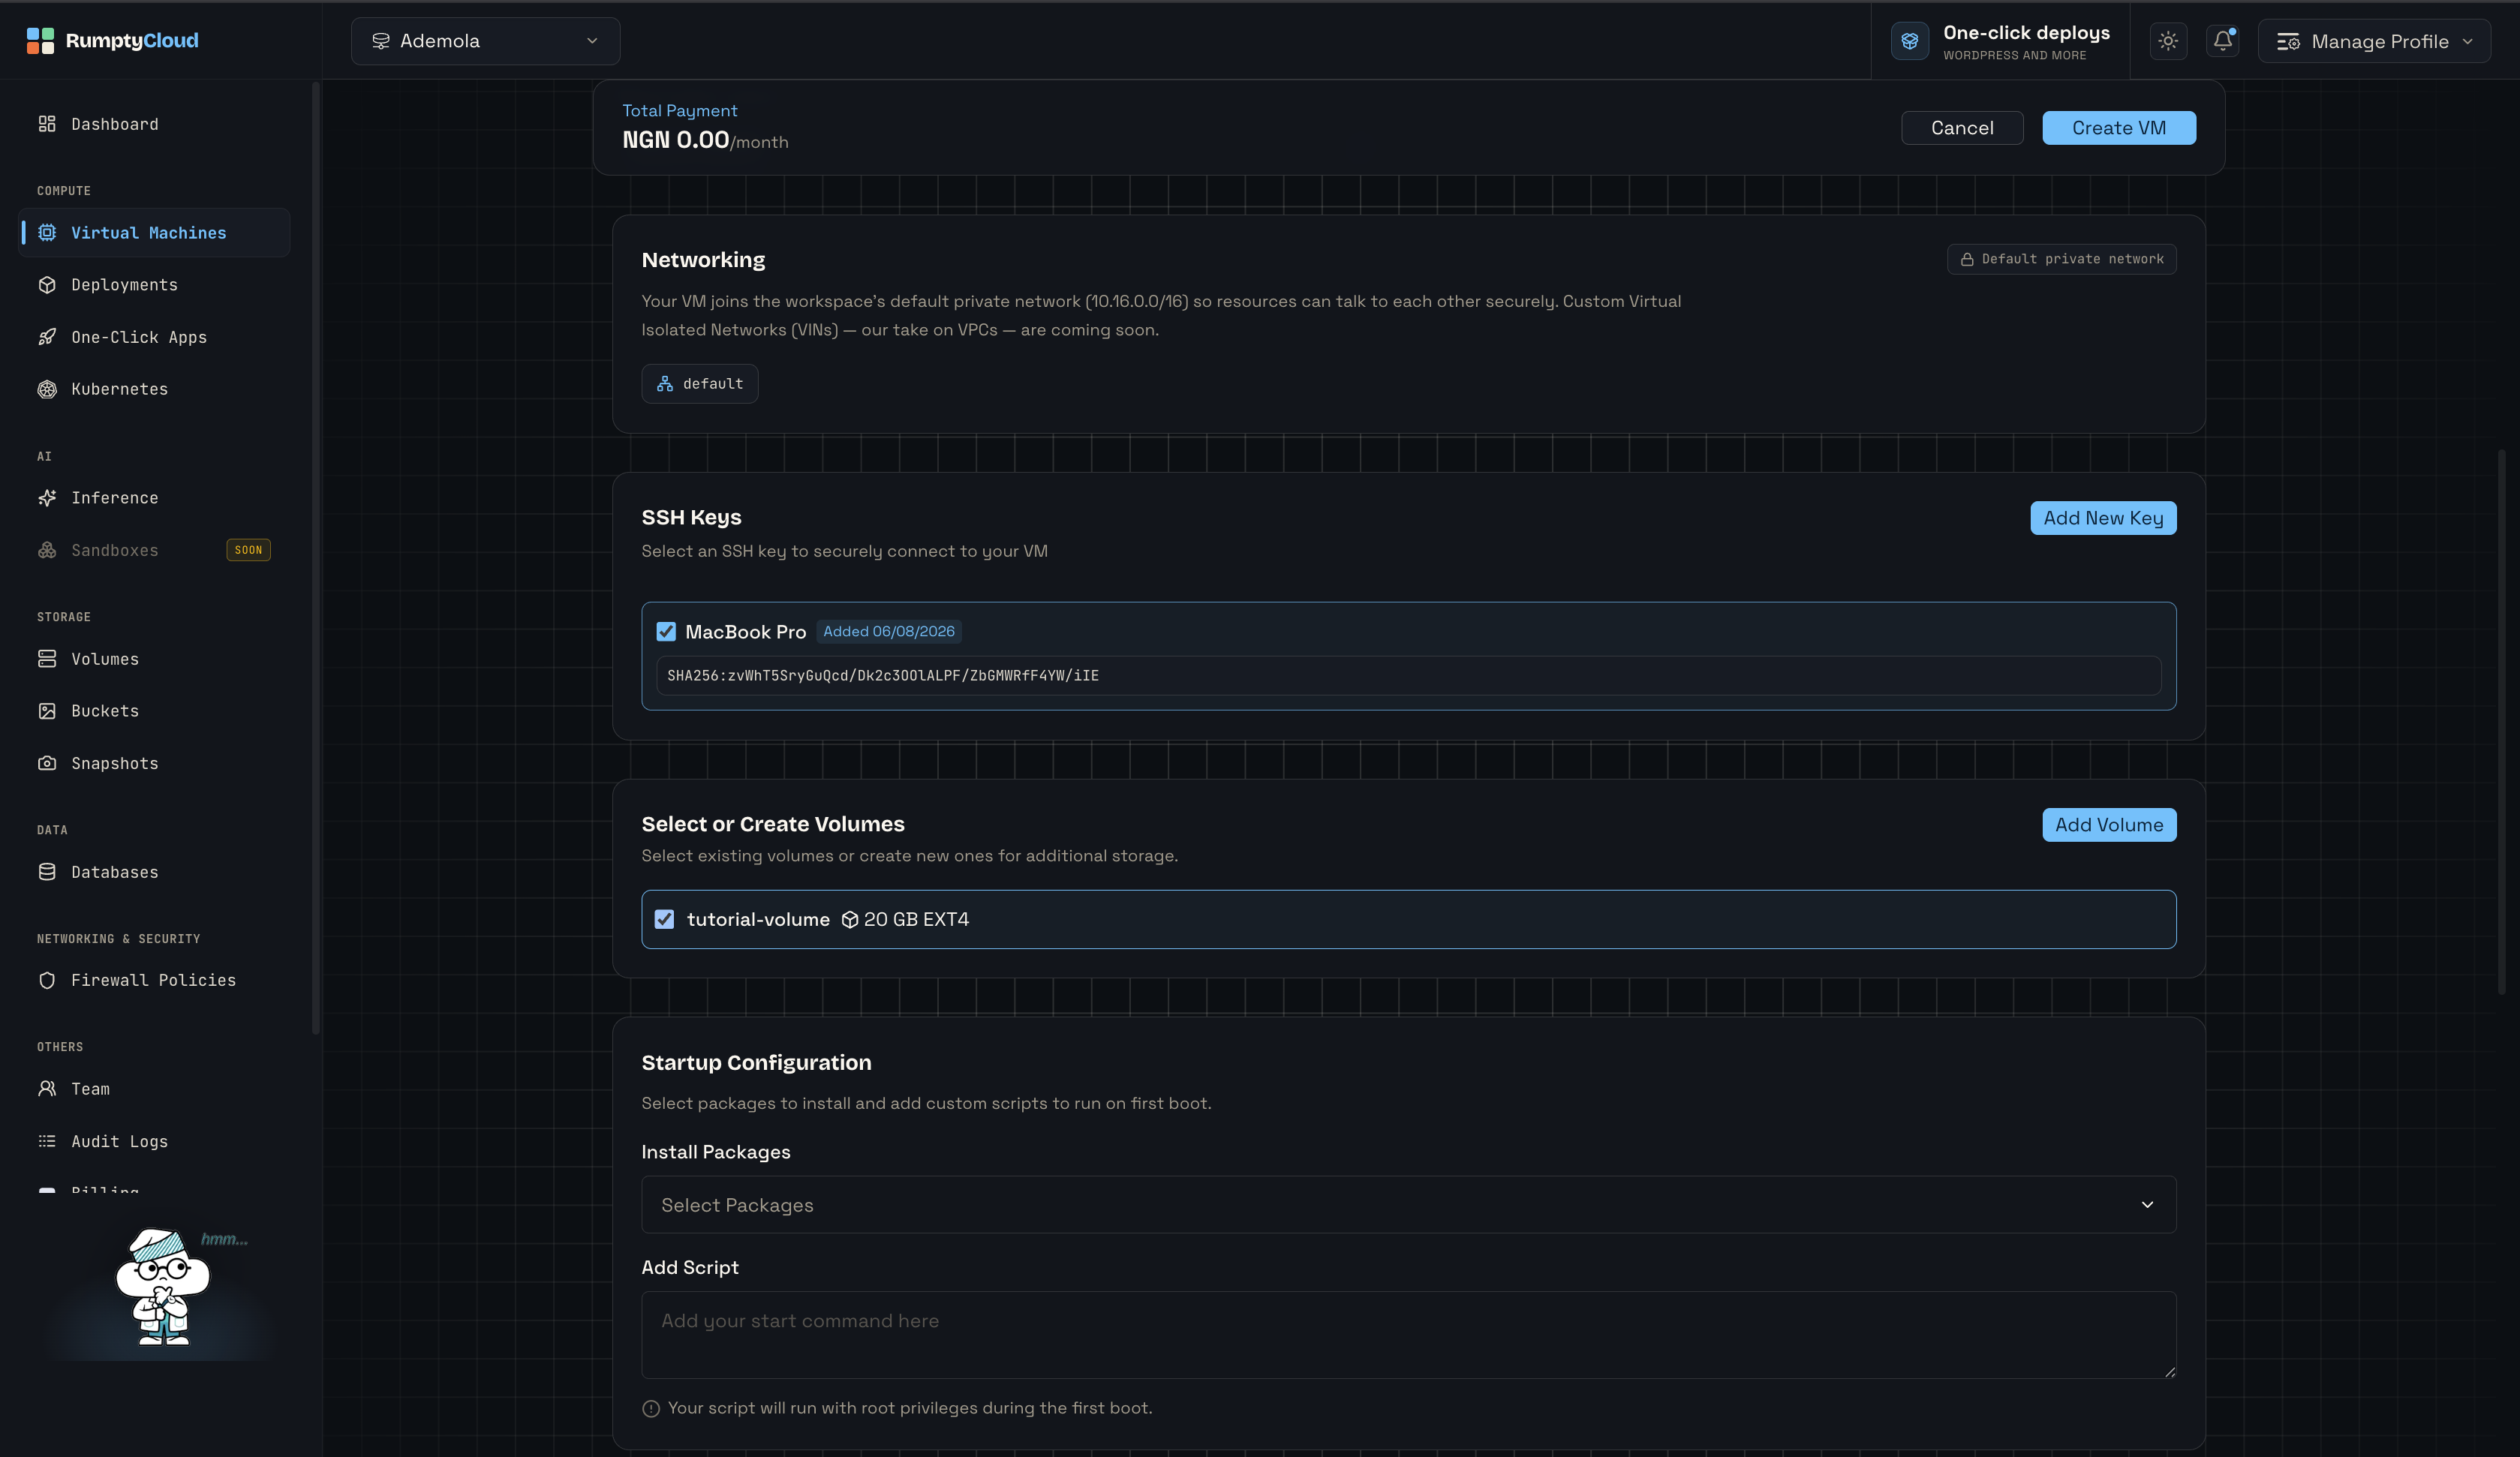
Then select the SSH key that will let you into the machine:
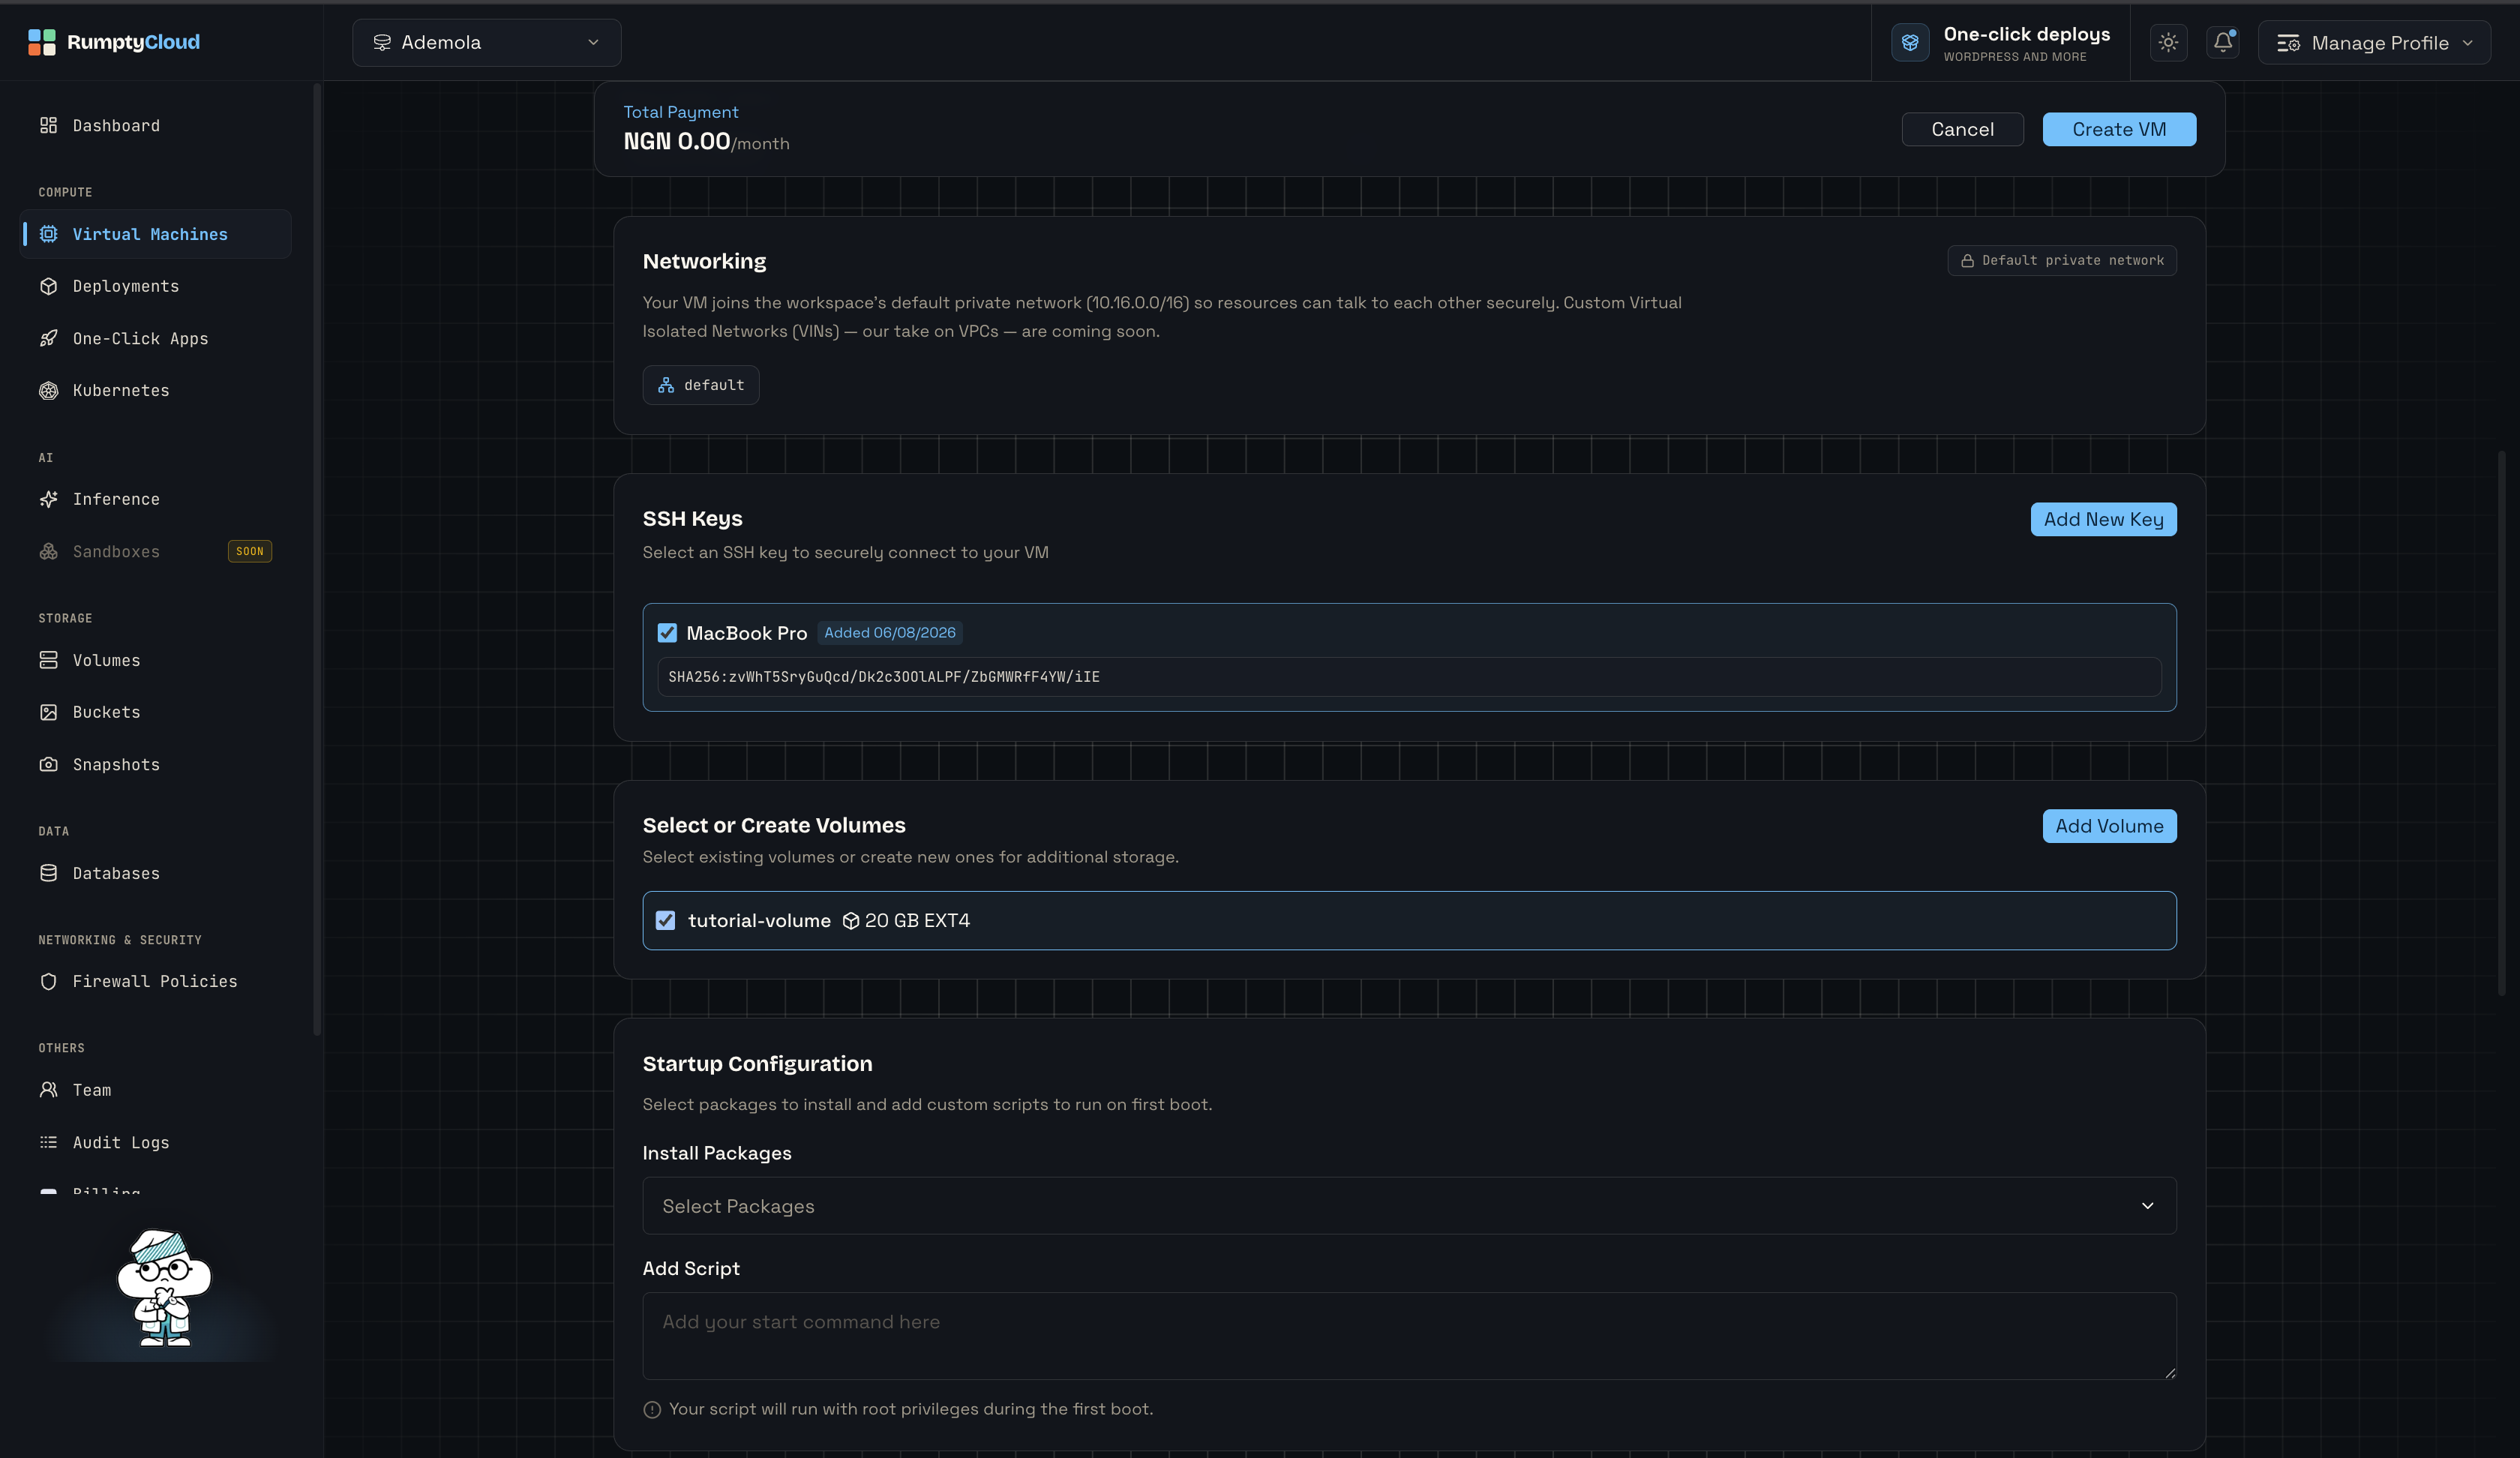
Finally, the optional Startup Configuration — Install Packages or Add Script to run a custom script on first boot (it runs with root privileges).
Your VM automatically joins the workspace’s default private network, so your resources can talk to each other securely. Custom Virtual Isolated Networks (VINs) are coming soon.
Review the Total Payment estimate at the top of the form, then select Create VM.
The first time you add a VM, RumptyCloud asks you to accept the Acceptable Use Policy before the creation is submitted.
4. Watch it provision
Once you click Create VM, you land on the VM detail page with a live progress panel showing percentage complete, elapsed time, and step-by-step updates:
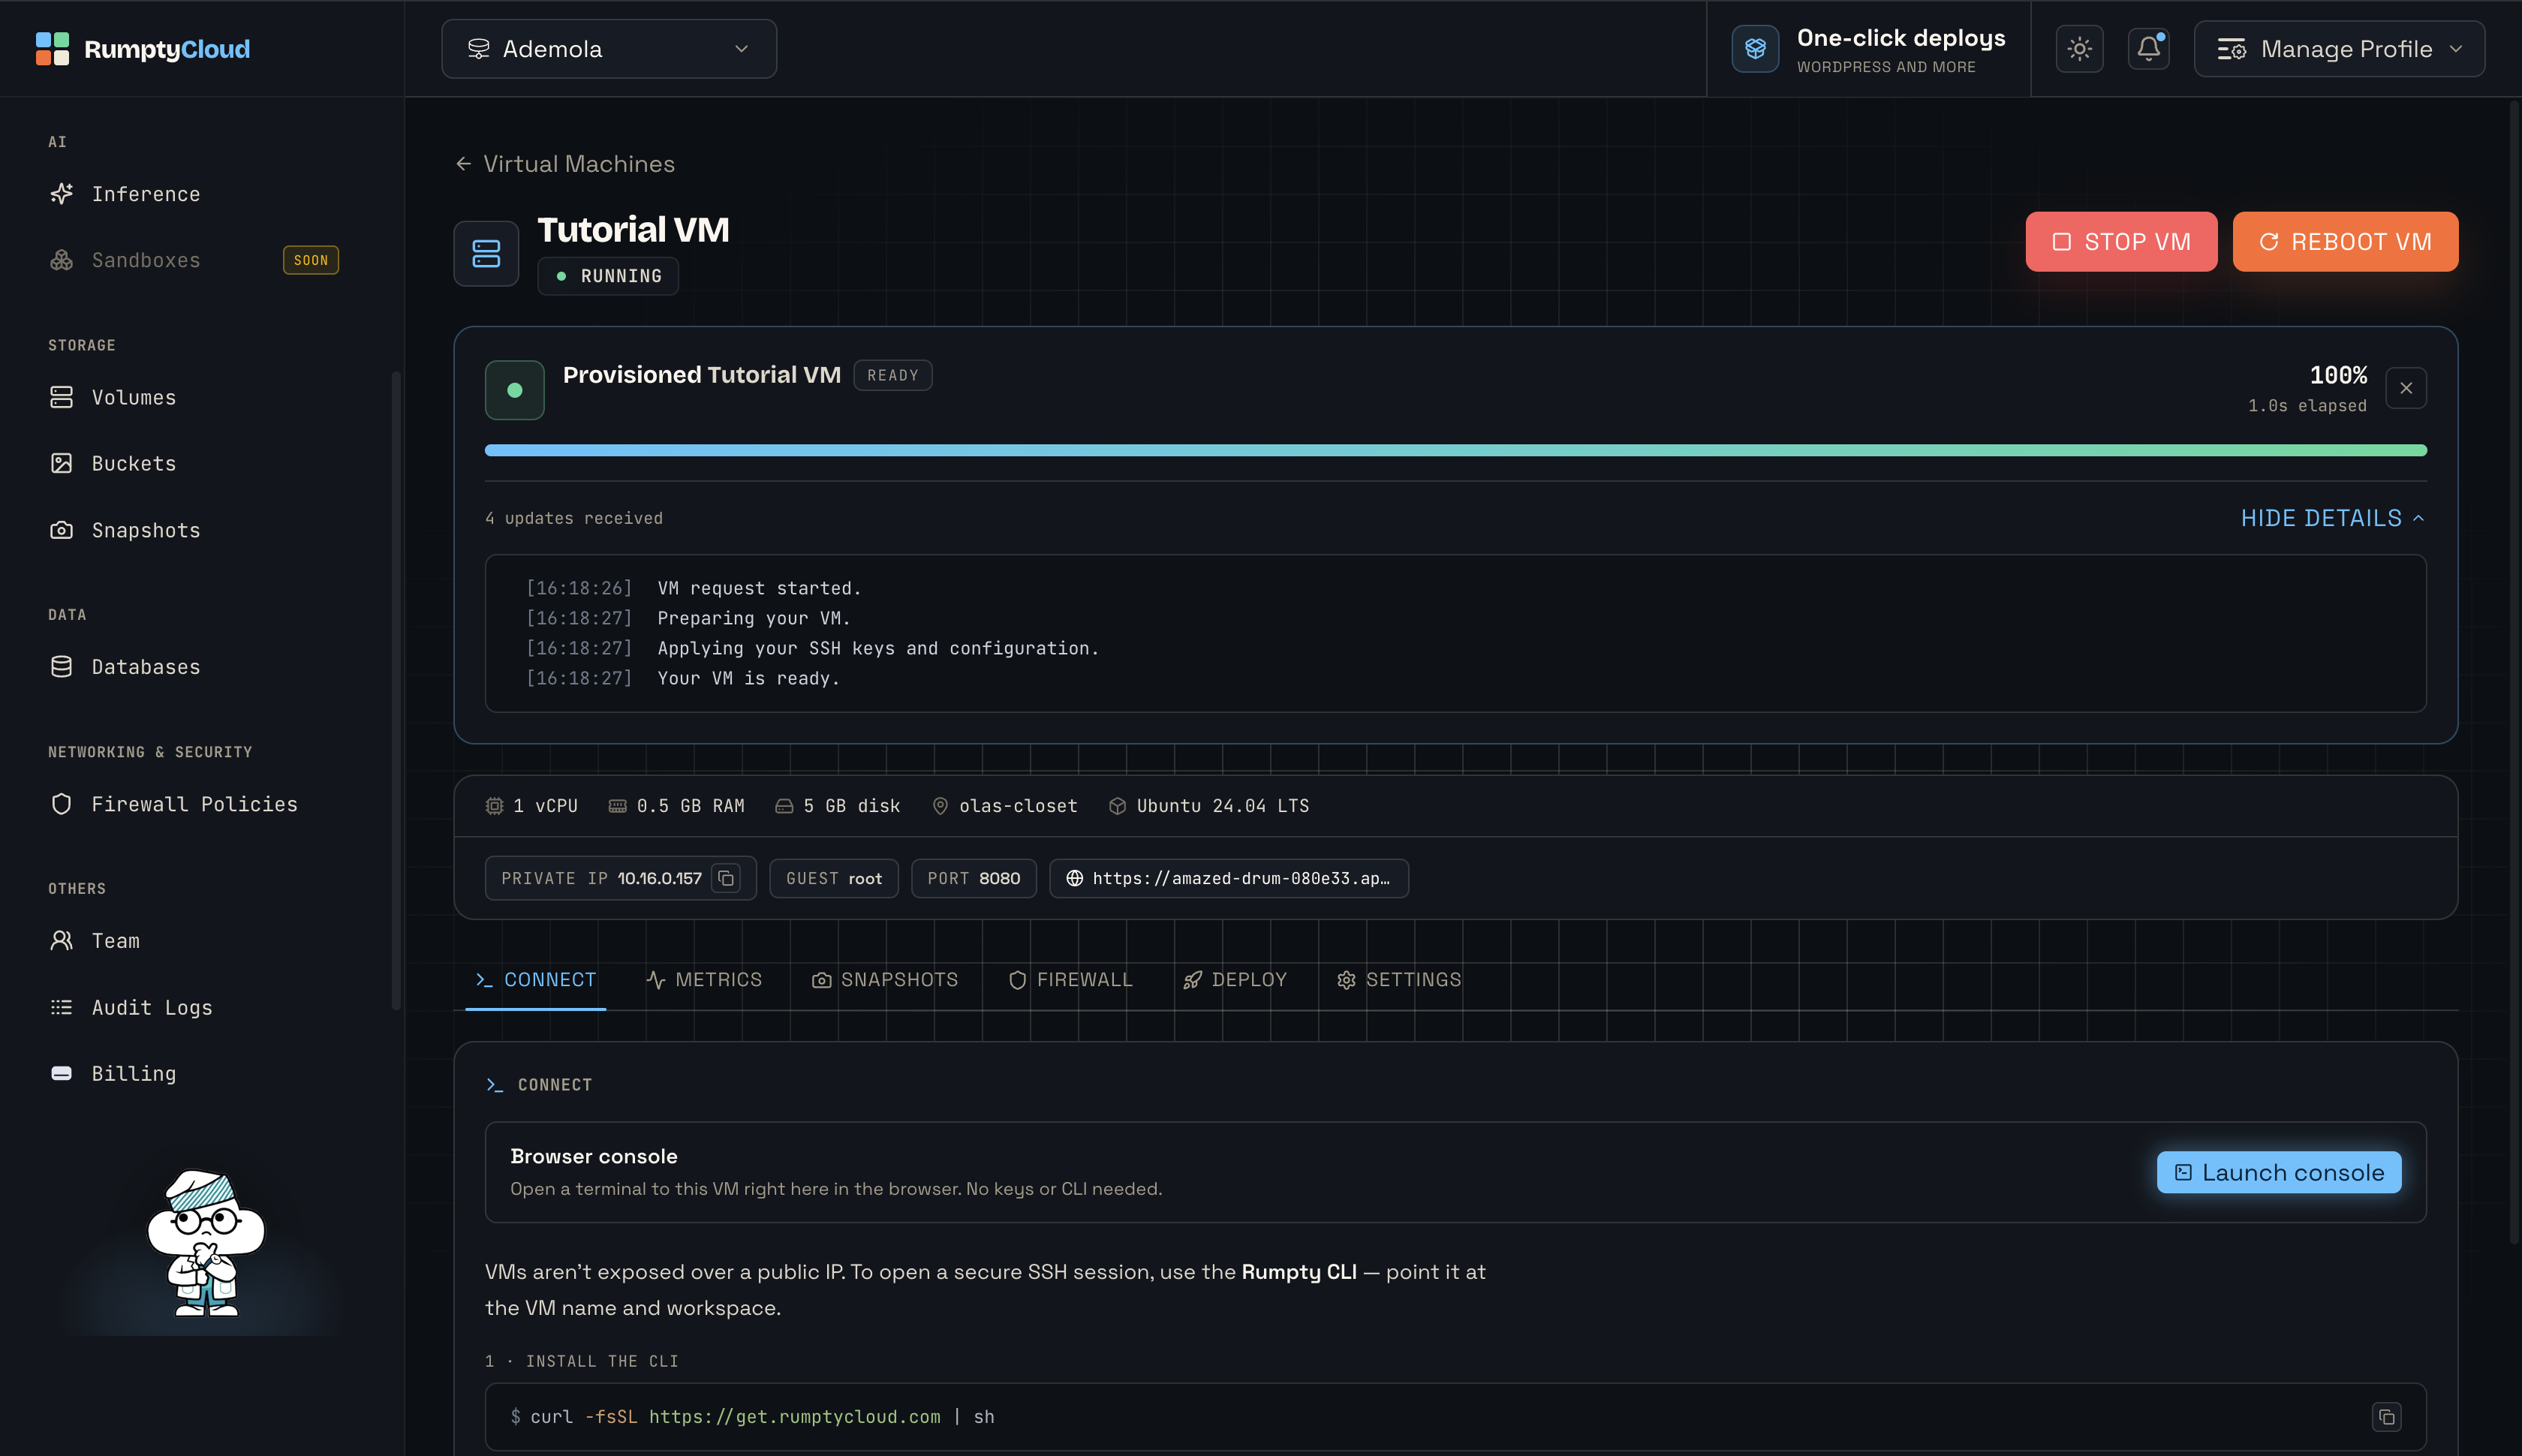
Preparing your VM
Preparing your workspace environment
Preparing the VM disk
Configuring secure access
Starting the VM
Waiting for network readiness
Waiting for VM access
Virtual machine is ready.
The VM’s status badge switches to RUNNING once provisioning finishes. The detail page now shows the spec summary (vCPU, RAM, disk, region, OS image), the VM’s private IP, and the guest username (root on new VMs).
5. Connect to your VM
RumptyCloud VMs don’t have a public IP by default, so you can either connect through the browser console or the Rumpty CLI. Both options live on the VM detail page’s Connect tab:
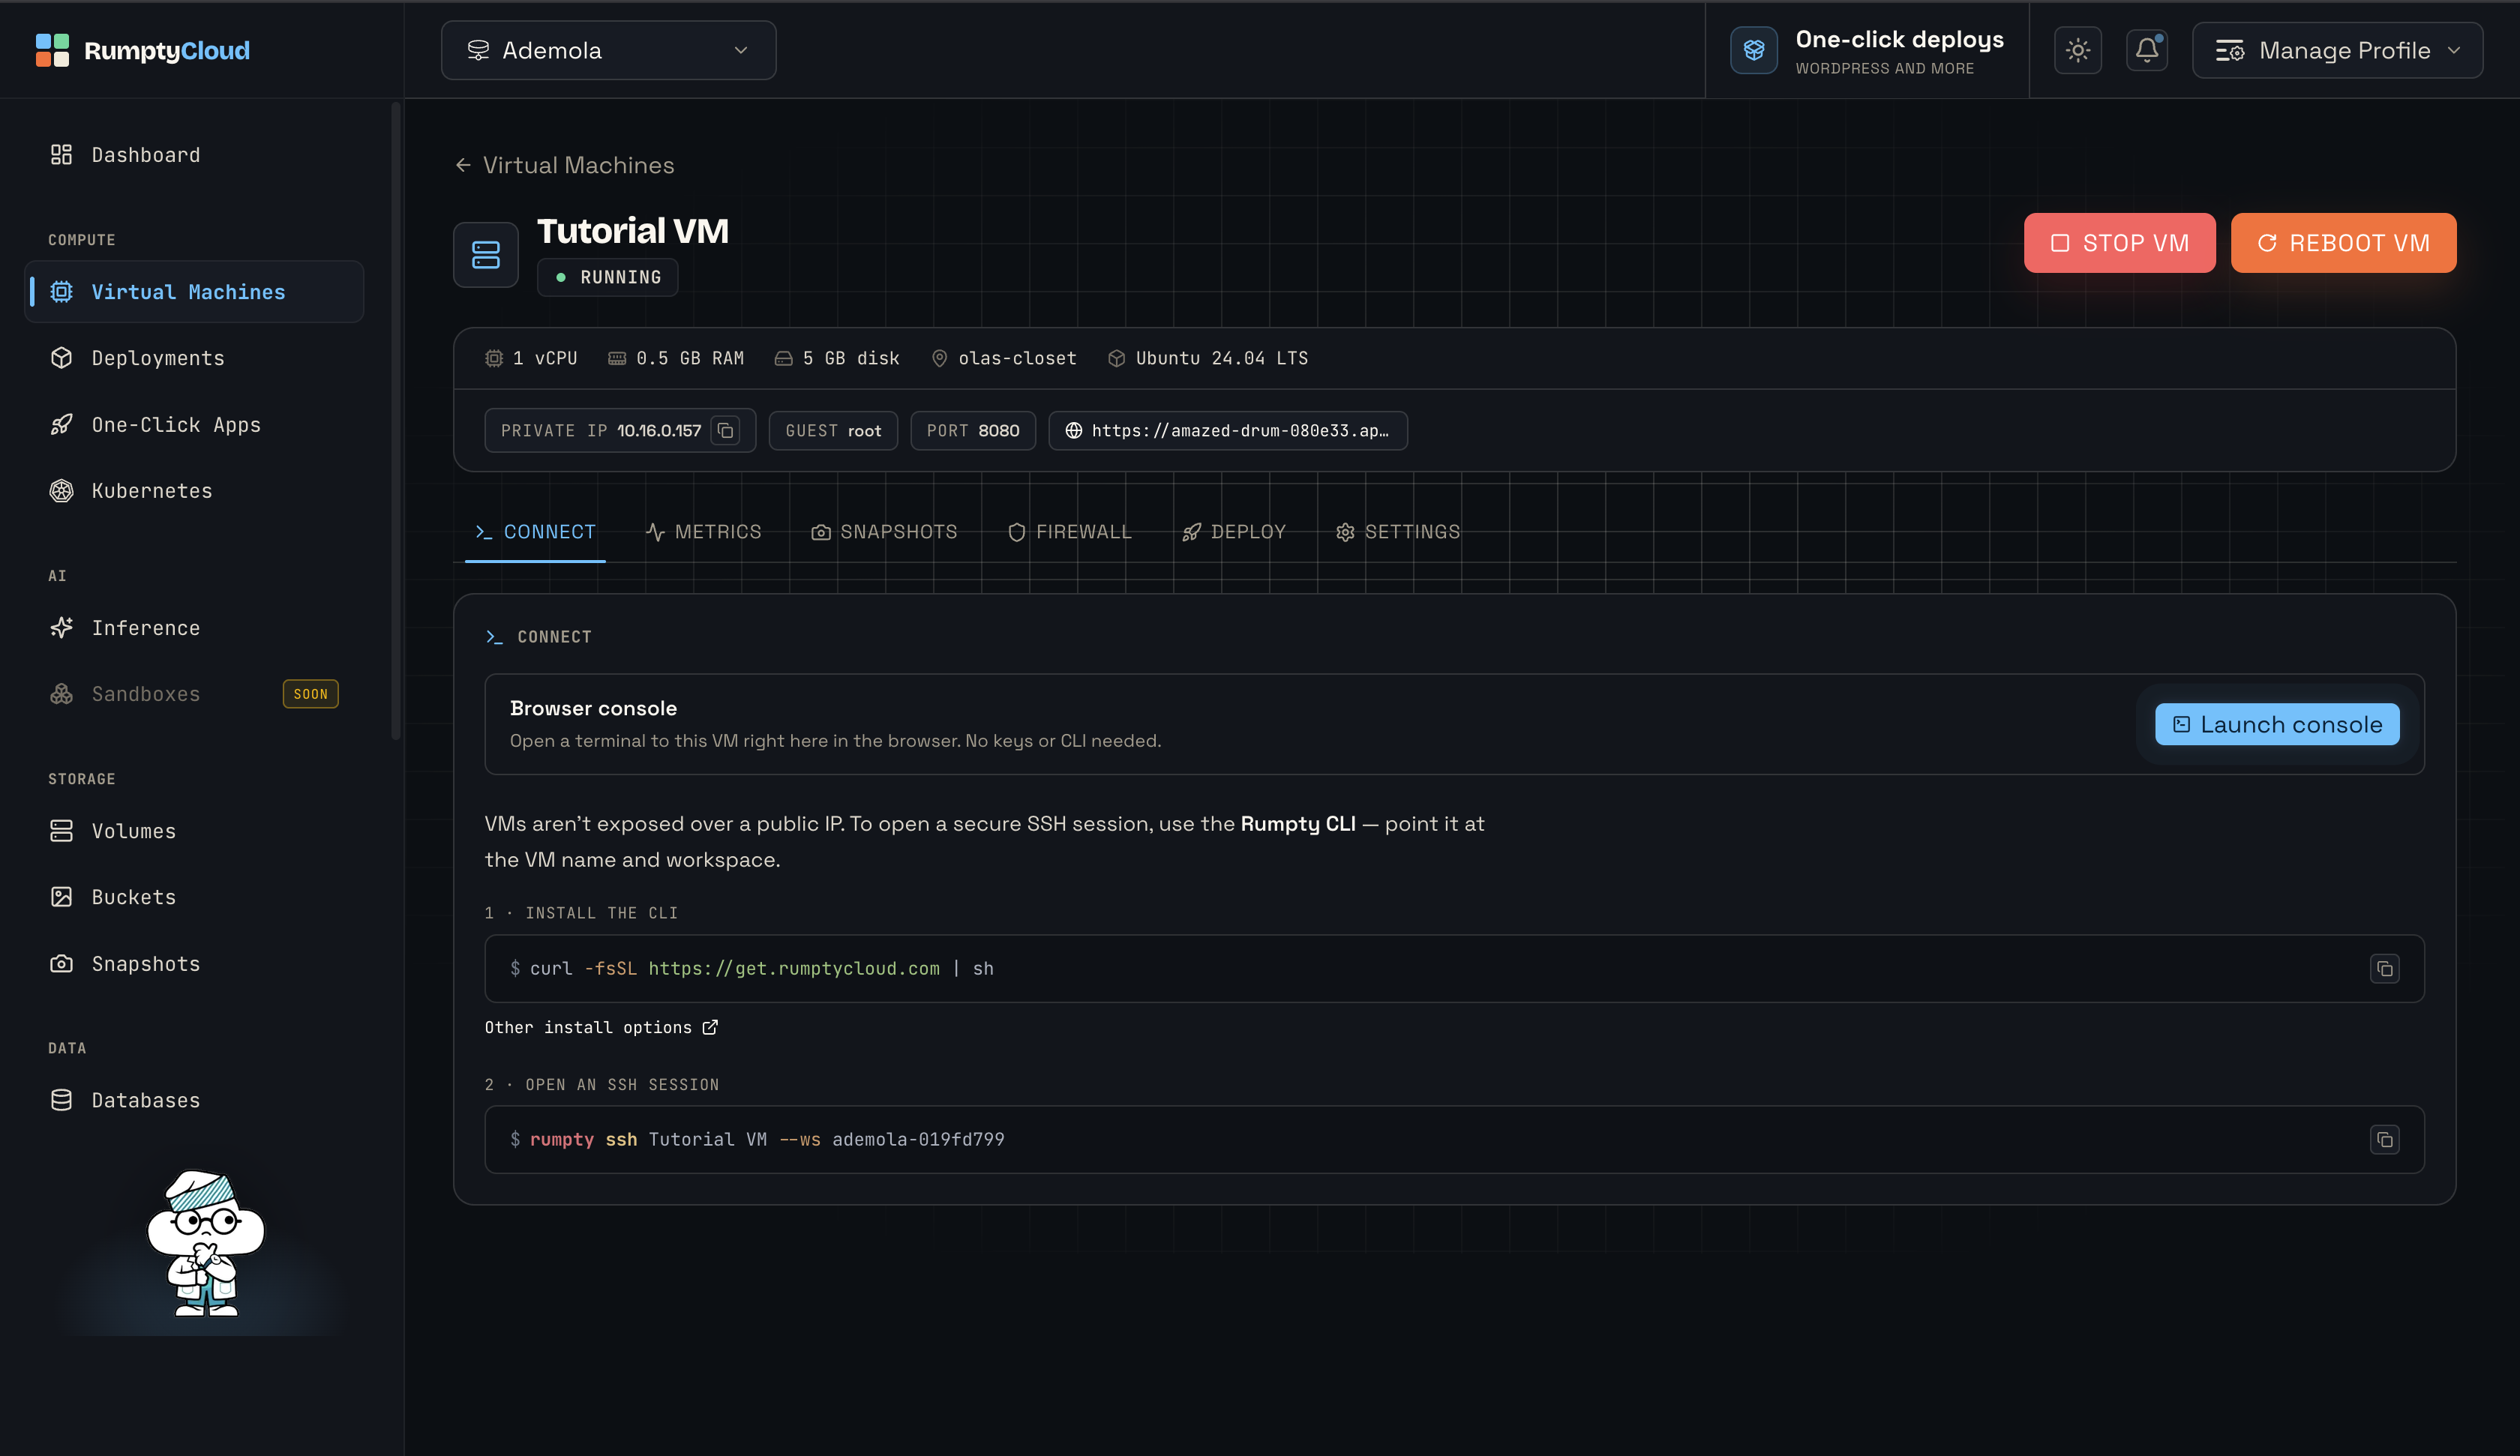
Option A: Browser console (fastest)
On the VM detail page, open the Connect tab and click on the Launch console button. This opens a terminal session for your VM directly in the browser.
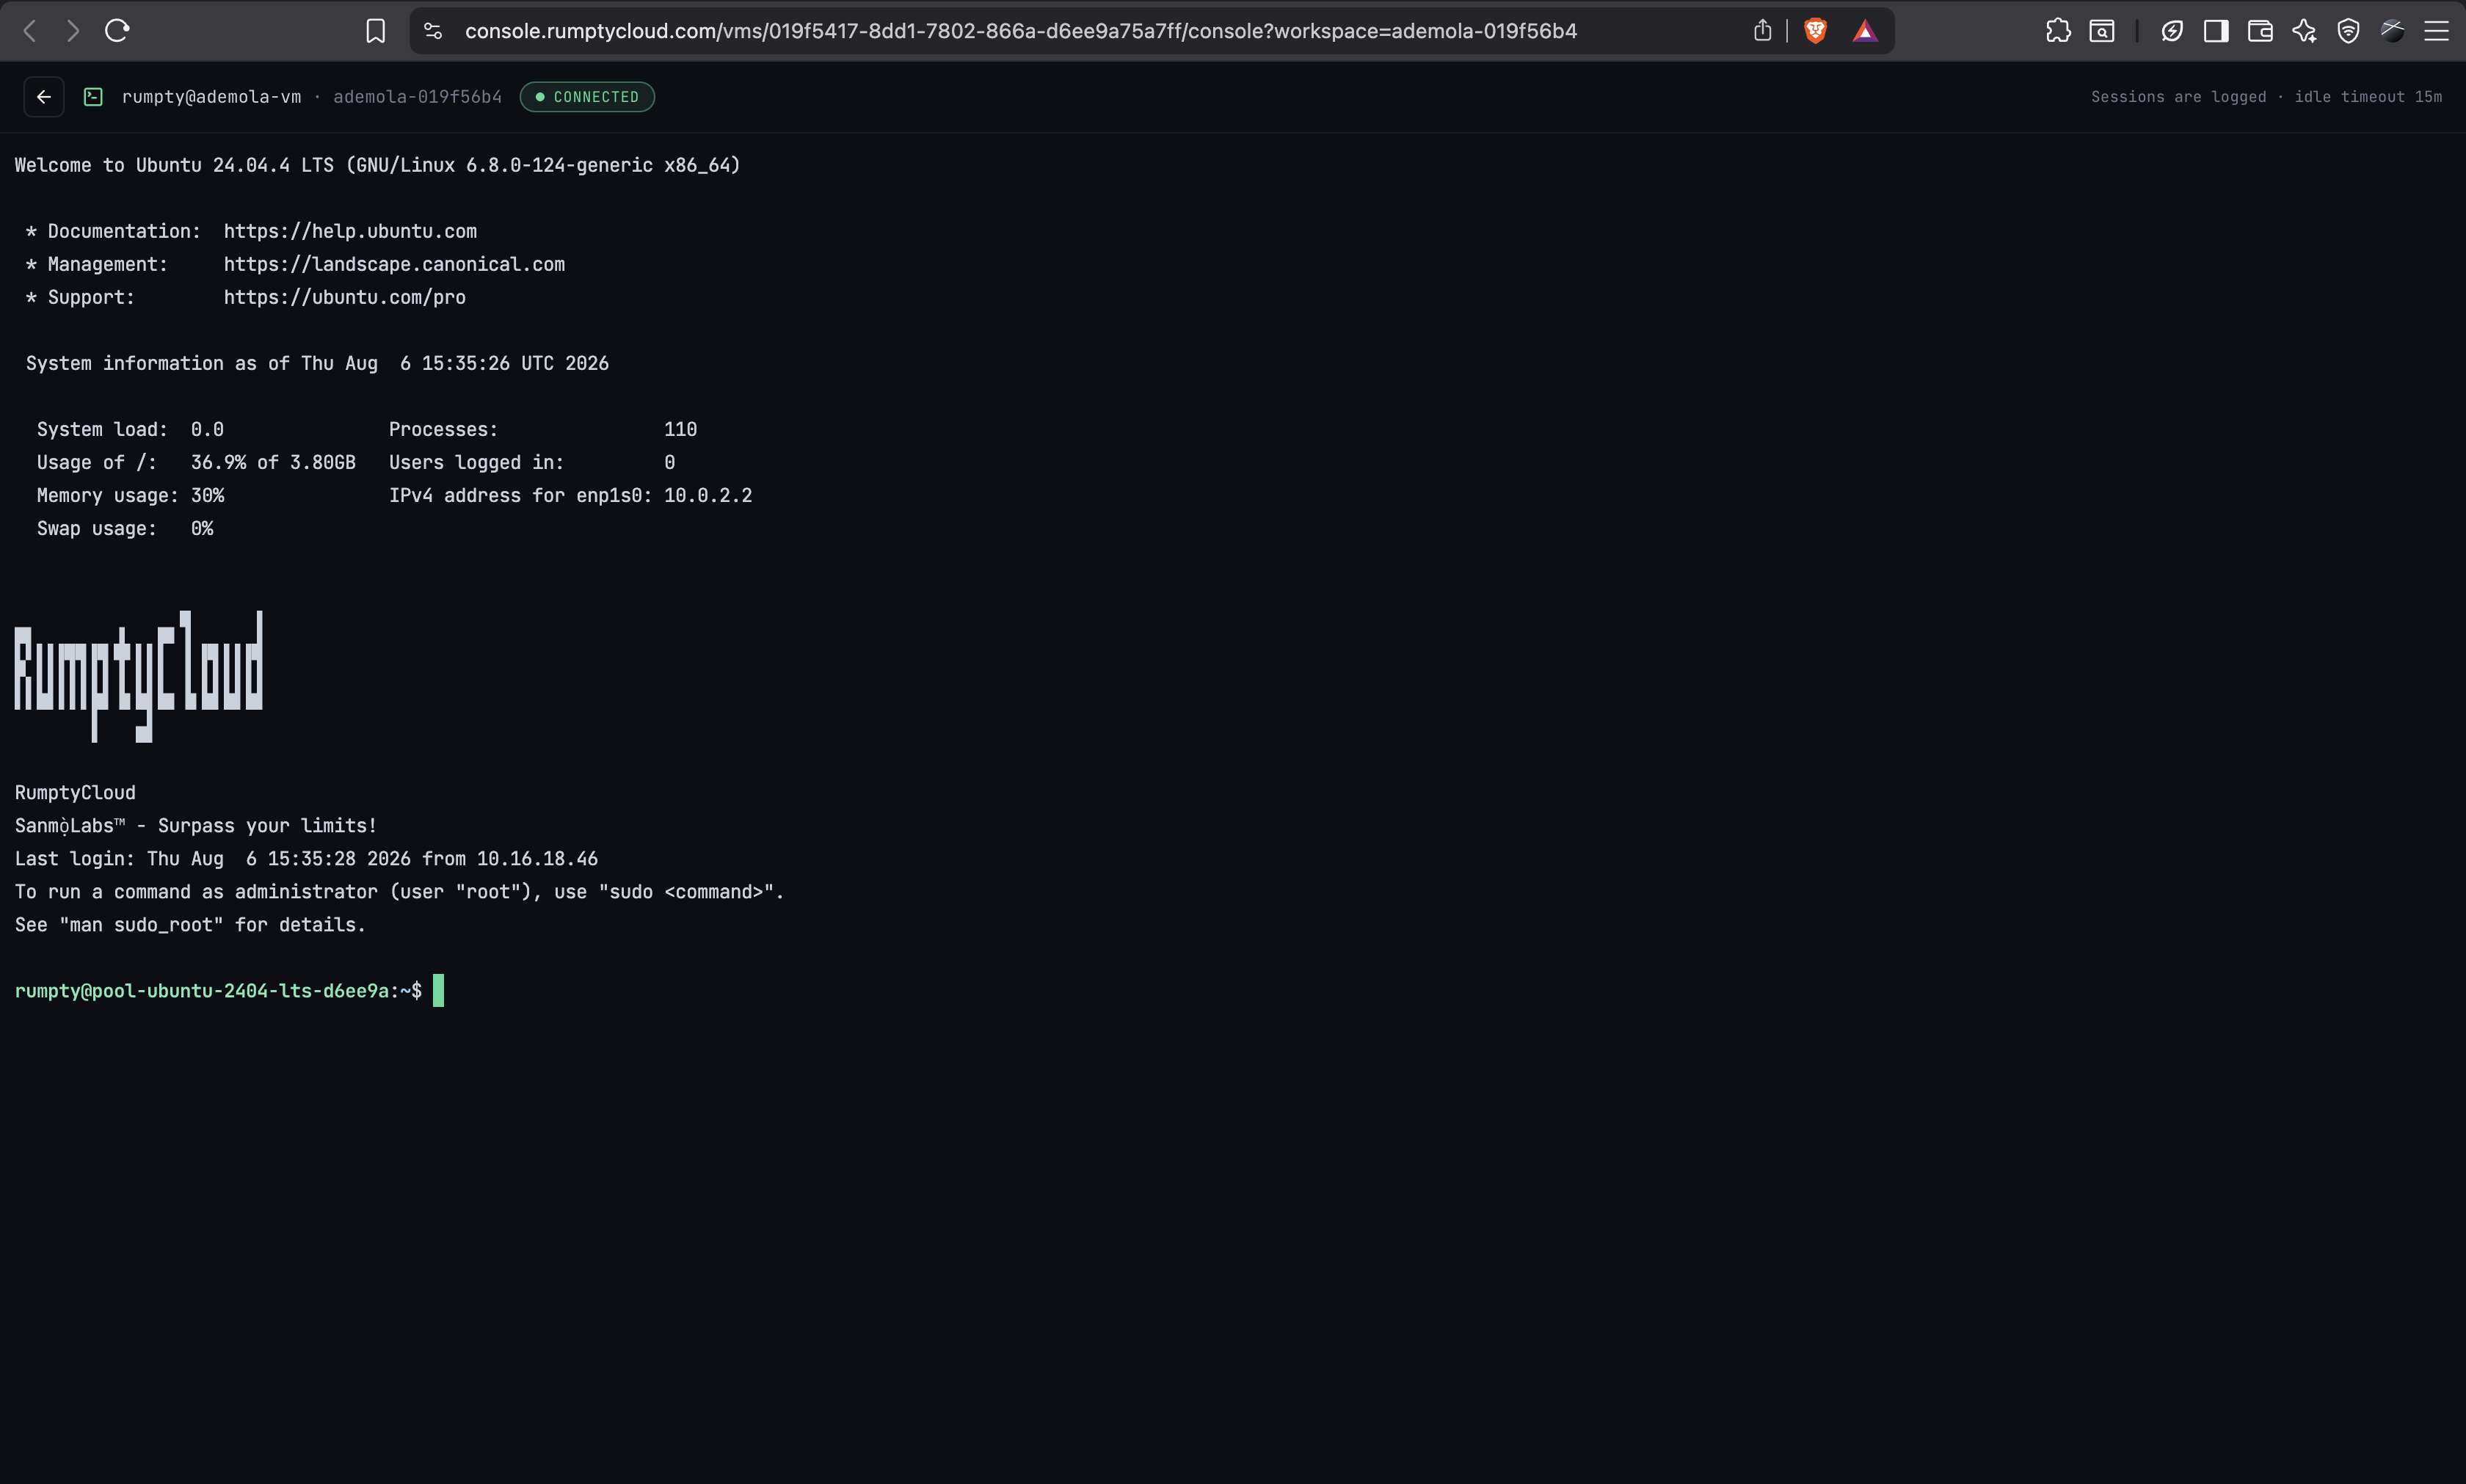
Browser console sessions are logged and disconnect after 15 minutes of inactivity. Use Reconnect to start a new session.
Option B: Rumpty CLI (recommended)
The Connect tab shows the install command for the Rumpty CLI:
curl -fsSL https://get.rumptycloud.com | shVerify the install, then sign in:
rumpty --version
rumpty login
The CLI prints a one-time code and opens your browser. Approve the sign-in on the confirmation page, and your terminal completes automatically:
Logged in as <your-username>.Now connect to your VM:
rumpty ssh <vm-name> --ws <workspace-slug>This opens a secure SSH session. The VM detail page shows this command with your VM name and workspace slug already filled in — no public IP or manual port-forwarding required.
Useful flags:
--userto log in as a different guest user, and-i/--identityto point at a specific private key. SetRUMPTY_WORKSPACEonce and you can skip--wson every command.
6. Run your first commands
You are now root on a fresh Linux VM. Try a few basics:
uname -a                 # verify the OS and kernel
apt update               # refresh package lists
free -h                  # check available memory
You can also run one-off commands and transfer files without opening a session:
rumpty exec <vm-name> -- uptime
rumpty copy ./app.tar.gz <vm-name>:/tmp/
rumpty exec runs a non-interactive command on the VM — always put the remote command after --. rumpty copy (alias cp) copies files to or from the VM using vm:path syntax; it uses rsync when available and falls back to scp.
7. The default welcome service
Every new VM comes with a pre-configured HTTP App on port 8080 — that’s the VM’s app URL shown on the detail page. Open it in your browser and you’ll see the welcome page:
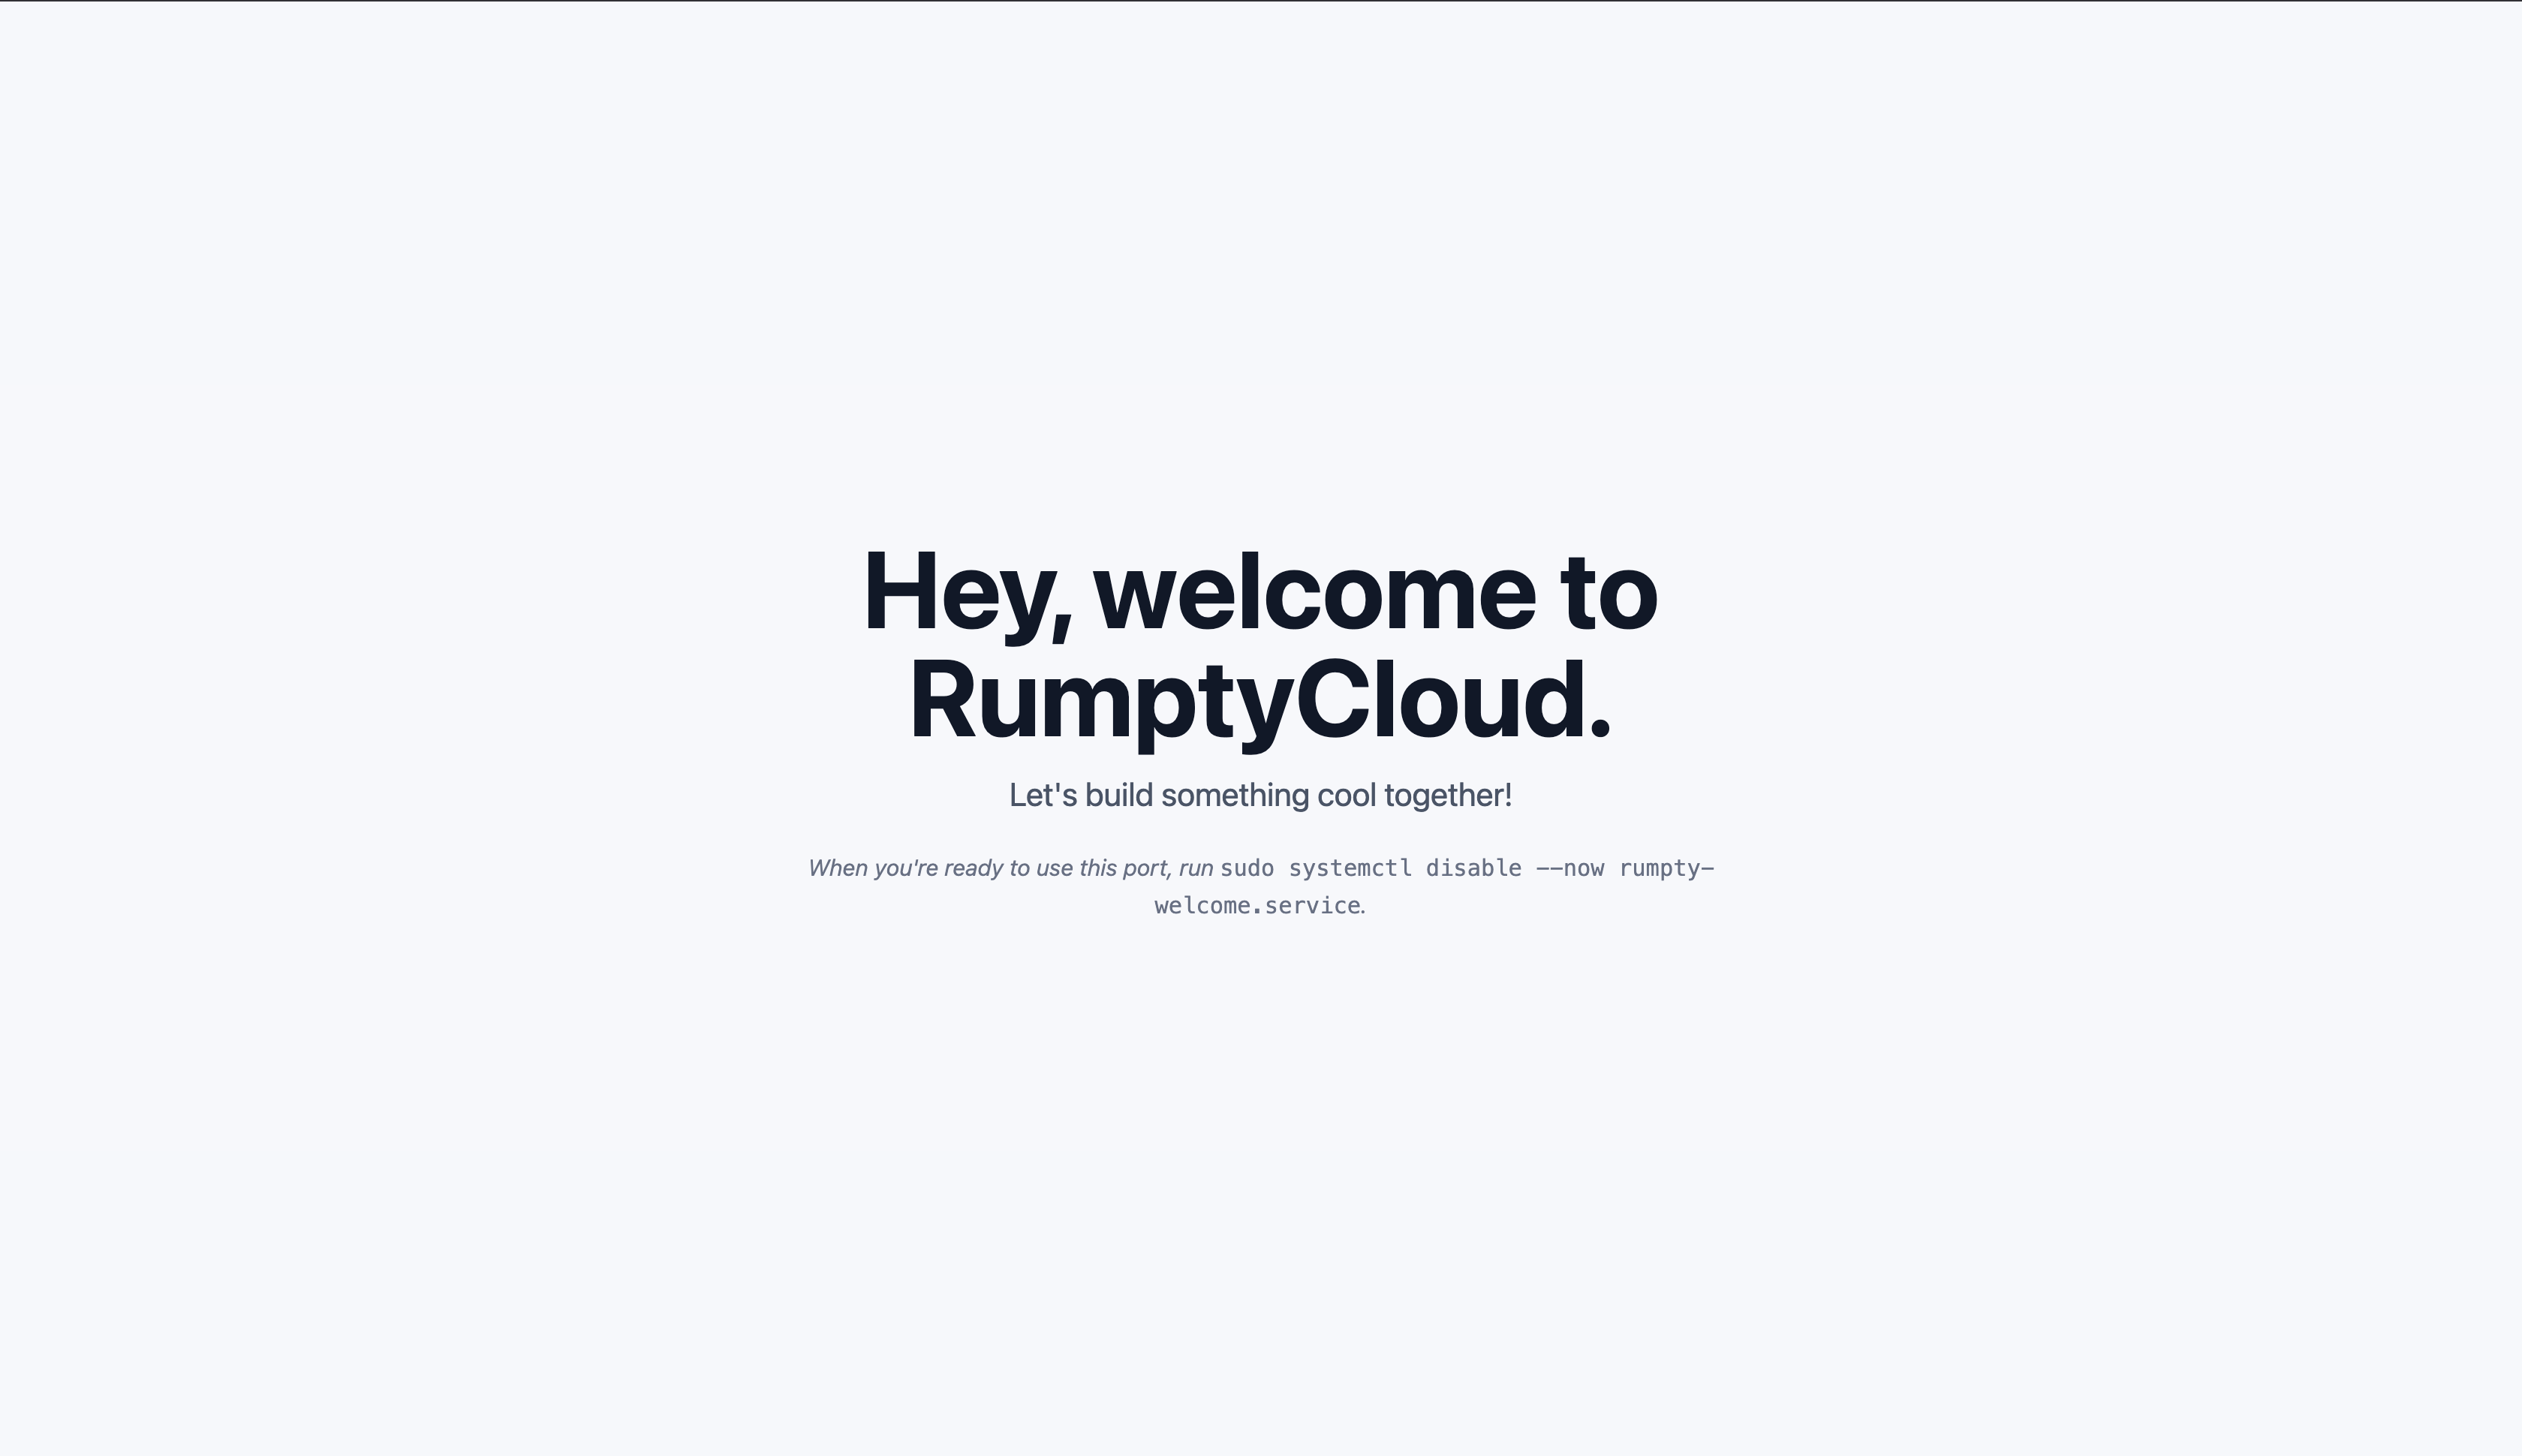
This service is handy for a quick health check after provisioning, but it’s holding port 8080. When you’re ready to run your own app on that port, stop the welcome service with:
sudo systemctl disable --now rumpty-welcome.serviceThe service won’t start again on future boots, freeing port 8080 for your app. If you ever want it back, run sudo systemctl enable --now rumpty-welcome.service.
Choosing a plan
Compute plans are selected when you create the VM. Prices are per month; usage accrues prorated for the time the VM exists within the billing cycle.
| Plan | Price | vCPU | Memory | Storage | Bandwidth |
|---|---|---|---|---|---|
| Ephemeral Trial | Free | 1 vCPU | 512 MB | 5 GB SSD | Included |
| Launch | NGN 2,092.50/mo | 1 vCPU | 512 MB | 10 GB SSD | Included |
| Micro | NGN 3,645.00/mo | 1 vCPU | 1 GB | 20 GB SSD | Included |
| Core | NGN 6,210.00/mo | 1 vCPU | 2 GB | 30 GB SSD | Included |
| Scale | NGN 8,302.50/mo | 2 vCPU | 2 GB | 50 GB SSD | Included |
| Power | NGN 12,460.50/mo | 2 vCPU | 4 GB | 80 GB SSD | Down 750 Mbps / Up 750 Mbps |
| Ultra | NGN 22,842.00/mo | 4 vCPU | 8 GB | 160 GB SSD | Down 1000 Mbps / Up 1000 Mbps |
If you’re unsure, start with Micro — it’s inexpensive, and you can move to a larger plan later via a snapshot.
Ephemeral Trial is meant for quick testing, not production. It runs for up to 3 days, then the VM and its root disk are permanently deleted — back up anything you need. Only one active ephemeral VM is allowed per account at a time.
Plans cannot be changed in place. To move a workload to a different plan, take a snapshot of the VM, then create a new VM from that snapshot and select the new plan during creation.
Managing your VM
The VM detail page puts day-to-day controls in the header and tabs:
- Start / Stop / Reboot — available in the page header. Stopping interrupts running apps and SSH sessions; rebooting causes a short interruption while the VM comes back online.
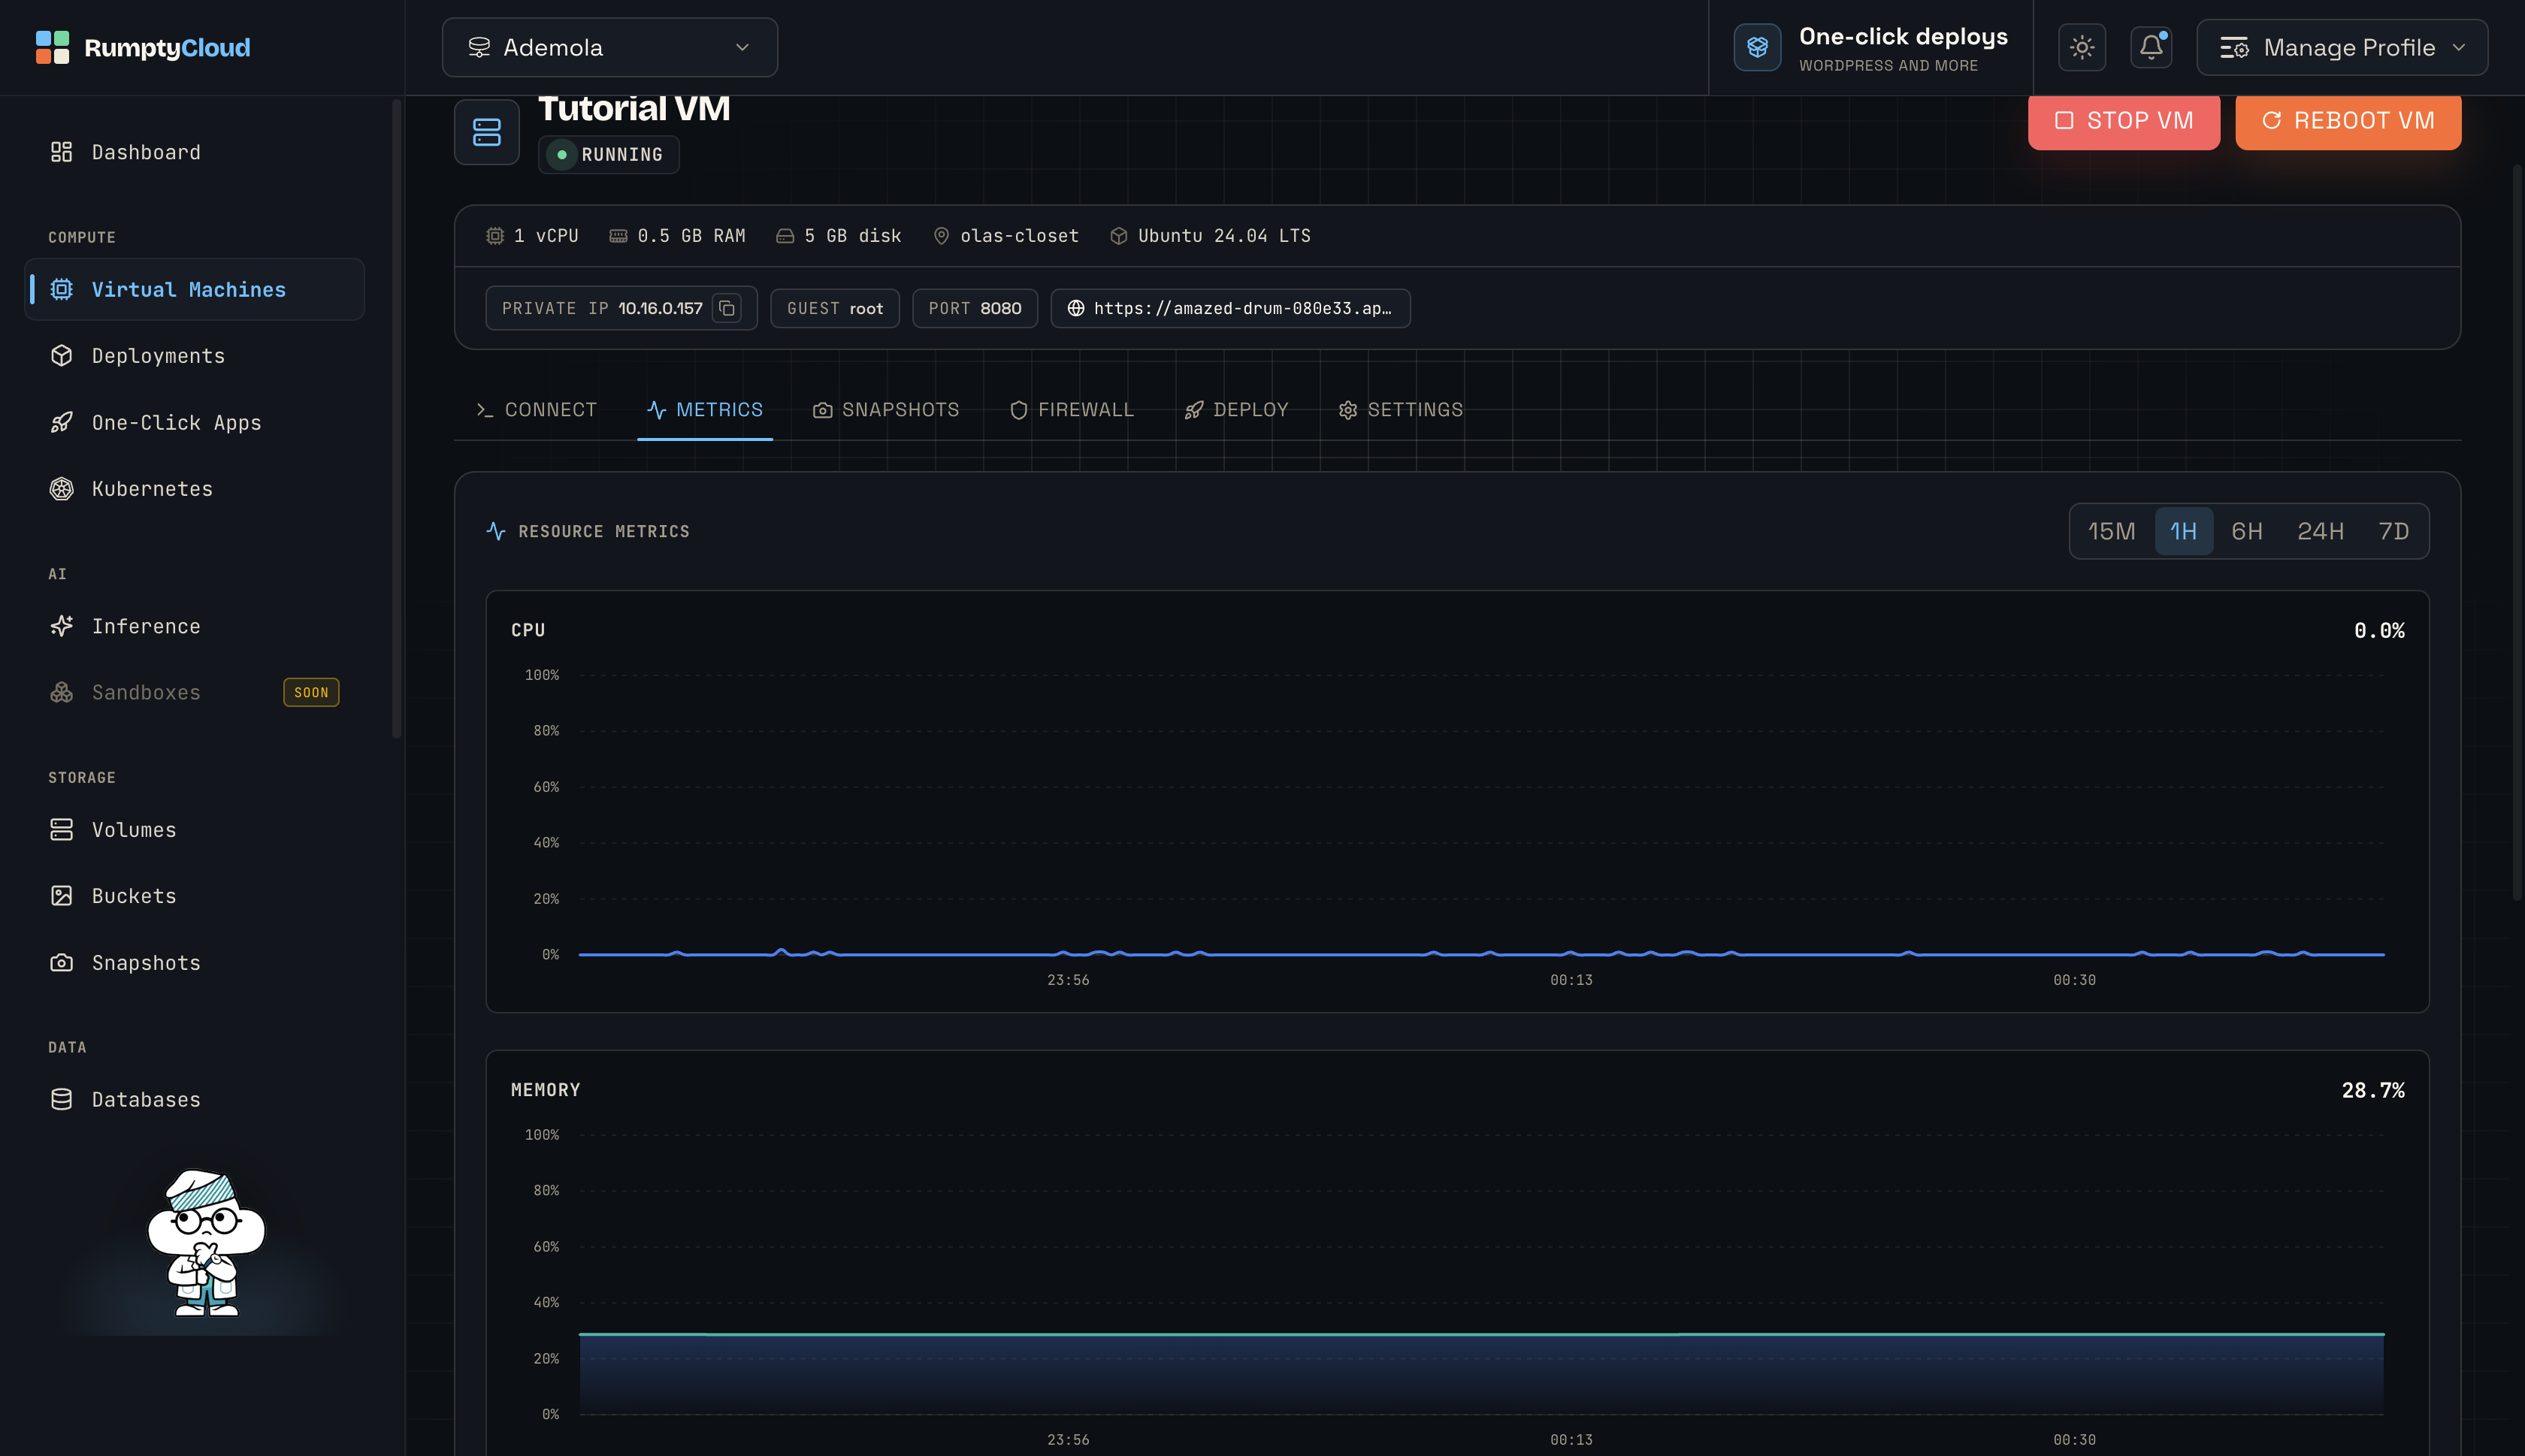
- Metrics — live charts for CPU, memory, disk usage, and bandwidth, with time windows from 15 minutes to 7 days:
- Snapshots — capture the state of the boot disk before risky changes, restore it, or clone a working environment into a new VM. Leave Shut down VM during snapshot checked for a cleaner restore point.
- Firewall — attach firewall policies to control what traffic is allowed.
When attaching a firewall policy with inbound rules, RumptyCloud activates default inbound deny — only traffic matching allow rules gets through. Confirm port 22 is included in the policy before attaching, or you will lose
rumpty sshaccess.
Exposing a service (optional)
Your VM isn’t publicly reachable by default, but you can expose internal services over secure HTTPS:
- Open the VM detail page → Settings tab.
- Under Exposed ports, enter the Port (e.g.
3000) and an optional Service name. - Select the protocol (HTTP or gRPC) and click Expose Port.
Each exposed port gets its own URL, listed in the table with a status (Pending, Ready, Failed). The service inside the VM must listen on 0.0.0.0:<port>, not only 127.0.0.1.
You can do the same from the CLI:
rumpty expose <vm-name> --port 3000 --name api
rumpty unexpose <vm-name> --name api
Two ports are pre-configured on every VM: 22 (SSH, used by rumpty ssh) and 8080 (HTTP App, the VM’s app URL).
Cleaning up
To permanently remove a VM:
- Open the VM detail page → Settings tab.
- Select Destroy VM at the bottom of the page.
- Type the VM’s exact name in the confirmation dialog to enable deletion.
This cannot be undone. Attached volumes are detached but not deleted — they remain in Storage → Volumes and can be reattached to another VM. From the CLI, rumpty vm delete <vm-name> does the same.
Troubleshooting
| Problem | Fix |
|---|---|
rumpty ssh says it can’t reach the VM |
The VM is not running. Start it from the detail page header or with rumpty vm start <vm-name>. |
| Lost SSH access after attaching a firewall policy | The policy has inbound rules but no port 22. Detach the policy, add a rule allowing port 22, and reattach. |
| Browser console opens blank | The VM is still provisioning. Wait until the status badge shows RUNNING. |
| Ephemeral VM disappeared | The 3-day trial expired and the VM was permanently deleted. There is no recovery — create a new one. |
Conclusion
You now have a running Linux VM on RumptyCloud, connected over SSH through the Rumpty CLI. From here you can install packages, run services, attach persistent volumes for stateful data, or ship builds straight to the VM with the Deploy tab. Every control you used here — creation, connection, snapshots, firewall, and cleanup — stays on the VM detail page, so spinning up your next machine takes just a few clicks.