
Django’s “batteries-included” philosophy makes it a fantastic framework for building robust web applications quickly — but getting that application from your local machine into production is often where things get complicated. Between configuring WSGI/ASGI servers, managing environment variables, setting up databases, and handling static files, deployment can feel like a project of its own.
In this tutorial, we’ll deploy a Django application on a virtual machine hosted on Rumpty Cloud. Unlike managed platform-as-a-service offerings that abstract away the server, deploying on a VM gives you full control over the environment — you’ll be provisioning the server yourself, installing dependencies, configuring a WSGI server like Gunicorn, setting up Nginx as a reverse proxy, and managing your database, all from the ground up.
This approach takes a bit more setup work than a managed platform, but it gives you a deeper understanding of what’s actually happening under the hood — and more flexibility to configure things exactly how you want them.
By the end of this guide, you’ll have a fully deployed Django application running on a Rumpty Cloud VM, along with a solid understanding of the deployment workflow you can reuse for future projects.
What you will need
Before you begin, make sure you have:
- A working Django project (or you can follow along with a sample app) hosted on a Git repository
- A Rumpty Cloud account with a VM provisioned
- SSH access to your VM
- Basic familiarity with the command line and Git
1. Get Rumpty CLI
To SSH into your server, you’ll use the official rumpty-cli tool. Install it with the following script:
Follow instuction on https://github.com/Sanmo-Labs/rumpty-cli about how to install Rumpty Cli and get started
2. Spin up your Vm
Log on to your Rumpty Cloud platform and click Virtual Machines, followed by Create VM. Select the appropriate options for your instance — operating system, region, and so on. Under Compute, choose the specs that best match your workload (a small/medium instance is usually enough for a basic Django app; scale up if you’re expecting heavier traffic). You can follow the tutorial here How to spin up a VM.
Once the VM has spun up and is ready, go to the Connect tab. Under Open an SSH session, copy the provided command and run it in your terminal (or Command Prompt on Windows). This will log you into your server.
Before installing anything, it’s good practice to create a non-root user to handle all configuration and app-running duties, rather than working as root directly.
sudo adduser rumptyYou’ll be prompted to set a password and optionally fill in some details (name, etc. — these can be left blank).
Grant the user sudo privileges:
sudo usermod -aG sudo rumptyThis adds rumpty to the sudo group, so they can run administrative commands when needed, without staying logged in as root full-time.
Free up port 8080
By default, Rumpty VMs run a welcome service on port 8080 — since that’s the port our Nginx config will use later, we need to stop and disable it first:
sudo systemctl disable --now rumpty-welcome.serviceThe –now flag stops the service immediately as well as disabling it from starting on future boots — otherwise it would just come back after a reboot.
3. Install prerequisite packages
$ sudo apt update
$ sudo apt install python3-venv python3-dev libpq-dev postgresql postgresql-contrib git nginx curl -y
Here’s what each of these does:
- python3-venv — lets you create isolated virtual environments for your project
- python3-dev — provides header files needed to build certain Python packages
- libpq-dev — required for psycopg2, the PostgreSQL adapter for Python
- postgresql / postgresql-contrib — the database server and useful extensions
- nginx — will serve as our reverse proxy in front of Gunicorn
- curl — handy for testing and downloading files
- git - handles git operations for your repository
4. Clone your git repository
Next, pull your project down onto the server from your Git repository:
git clone <your-repo-url>If your repository is private, Git will prompt you to authenticate — just follow the instructions it gives you (this usually means entering a personal access token instead of your password, or having SSH keys set up if you’re using an SSH URL).
5. Set up PostgreSQL
$ sudo -u postgres psqlThis will open an interactive psql shell where you can run SQL commands directly.
Next, create a database for your Django app:
CREATE DATABASE rumpty_db;Now create a dedicated user for the app rather than using the default postgres superuser — this is best practice, since it limits what the app can access if credentials are ever compromised:
CREATE USER rumpty_user WITH PASSWORD 'your_strong_password';Configure a few connection defaults for this user, which Django recommends for smoother operation:
ALTER ROLE rumpty_user SET client_encoding TO 'utf8';
ALTER ROLE rumpty_user SET default_transaction_isolation TO 'read committed';
ALTER ROLE rumpty_user SET timezone TO '<your_timezone>';
These lines set connection defaults for rumpty_user, so Django doesn’t need to configure them per-connection:
- client_encoding TO ‘utf8’ — ensures text is always handled as UTF-8
- default_transaction_isolation TO ‘read committed’ — sets how the database handles concurrent transactions (this is already Postgres’s default, but Django recommends setting it explicitly)
- timezone TO ‘<your_timezone>’ — keeps database timestamps aligned with what Django expects
Replace <your_timezone> with your actual timezone. I’d be using ‘UTC’.
Finally, grant the user full privileges on the database:
GRANT ALL PRIVILEGES ON DATABASE rumpty_db TO rumpty_user;Exit the psql shell:
\q6. Create a Python virtual environment
This helps manage your project dependencies and avoid conflicts with other applications on the server.
Navigate to your Django app directory and create the virtual environment:
cd django_project
python3 -m venv .venv
Activate the environment and install your project’s requirements:
source .venv/bin/activate
pip3 install -r requirements.txt
Since this is a production environment, we need a WSGI server to actually run the app — Django’s built-in runserver isn’t safe or performant enough for production use. We’ll use Gunicorn:
pip3 install gunicornOptional sanity check: before moving on to configuring Gunicorn, it’s worth confirming the app runs correctly on its own. This makes debugging much easier — if something breaks later, you’ll know it’s a Gunicorn or Nginx config issue rather than a problem with the app itself.
python manage.py runserver 0.0.0.0:8080Open your VM’s public URL on port 8080 in your browser. Your app should load successfully.
Once you’ve confirmed it’s working, stop the dev server (Ctrl+C) — next, we’ll configure Gunicorn to run the app properly.
deactivate7. Configure Gunicorn as a systemd service
Rather than running Gunicorn manually, we’ll set it up as a systemd service so it starts automatically and restarts if it crashes.
Create the service file:
sudo nano /etc/systemd/system/my_django_app.serviceAdd the following configuration:
[Unit]
Description=Gunicorn daemon for Django app project
After=network.target

[Service]
User=rumpty
Group=www-data
WorkingDirectory=/home/rumpty/django_project
ExecStart=/home/rumpty/django_project/.venv/bin/gunicorn \
          --access-logfile - \
          --workers 3 \
          --bind unix:/home/rumpty/django_project/gunicorn.sock \
          django_project.wsgi:application

[Install]
WantedBy=multi-user.target
A quick note on what’s happening here: User and Group control which system user runs the process (using a dedicated non-root user is safer), WorkingDirectory points to your project root, and ExecStart tells systemd how to launch Gunicorn — binding it to a Unix socket rather than a TCP port, which Nginx will connect to directly.
Start the service and enable it to launch on boot:
sudo systemctl start my_django_app.service
sudo systemctl enable my_django_app.service
Check that it’s running:
sudo systemctl status my_django_app.service● my_django_app.service - Gunicorn daemon for Django app project
Loaded: loaded (/etc/systemd/system/my_django_app.service; enabled; vendor preset: enabled)
Active: active (running) since Mon 2026-08-10 14:02:31 UTC; 12s ago
Main PID: 18422 (gunicorn)
Tasks: 4 (limit: 1137)
Memory: 58.2M
CGroup: /system.slice/my_django_app.service
├─18422 /home/rumpty/django_project/.venv/bin/gunicorn --access-logfile - --workers 3 --bind unix:/run/gunicorn.sock django_project.wsgi:application
├─18423 /home/rumpty/django_project/.venv/bin/gunicorn --access-logfile - --workers 3 --bind unix:/run/gunicorn.sock django_project.wsgi:application
├─18424 /home/rumpty/django_project/.venv/bin/gunicorn --access-logfile - --workers 3 --bind unix:/run/gunicorn.sock django_project.wsgi:application
└─18425 /home/rumpty/django_project/.venv/bin/gunicorn --access-logfile - --workers 3 --bind unix:/run/gunicorn.sock django_project.wsgi:applicationYou should see output confirming the service is active and listening, along with the socket path and process info.
To view the service logs at any time:
sudo journalctl -u my_django_app8. Set up Nginx
Nginx will sit in front of Gunicorn as a reverse proxy — handling incoming HTTP requests, serving static/media files directly (which is much faster than having Django do it), and forwarding everything else to Gunicorn.
Create a new config file:
sudo nano /etc/nginx/sites-available/dj_confAdd the following:
server {
    listen 8080;
    server_name holy-goose-6d0658.app.rumptycloud.com;

    location = /favicon.ico { access_log off; log_not_found off; }

    location /static/ {
        alias /home/rumpty/django_project/staticfiles/;
        expires 30d;
        access_log off;
    }

    location /media/ {
        alias /home/rumpty/django_project/media/;
        expires 30d;
        access_log off;
    }

    location / {
        include proxy_params;
        proxy_pass http://unix:/home/rumpty/django_project/gunicorn.sock;
    }
}
What each part does:
listen 8080;— tells Nginx to accept connections on port 8080. (Note the semicolon at the end — your draft was missing it, and Nginx configs will fail to load without it.)server_name— the domain Nginx matches this config against; requests to other hostnames on the same server won’t hit this block.location = /favicon.ico— quietly ignores favicon requests instead of logging a 404 for every browser tab that asks for one.location /static/andlocation /media/— serve static assets (CSS, JS) and user-uploaded media directly from disk via Nginx, bypassing Django/Gunicorn entirely. This is both faster and reduces load on your app server. expires 30d tells browsers to cache these files for 30 days.location /— the catch-all block. Anything not matched above gets proxied to Gunicorn over the Unix socket, using the standard proxy_params (headers like Host, X-Real-IP, etc., usually predefined by Nginx).
Enable the site by symlinking it into sites-enabled:
sudo ln -s /etc/nginx/sites-available/dj_conf /etc/nginx/sites-enabledSince Gunicorn’s socket lives inside your home directory, Nginx (running as the www-data user) needs execute permission on every folder in that path in order to reach it — even though it’s not reading or writing the files themselves. Without this, you’ll get a 502 Bad Gateway error even if everything else is configured correctly.
Grant execute permission on your home folder and project directory:
chmod 755 /home/rumpty
chmod 755 /home/rumpty/django_project
The execute bit on a directory controls whether a process can traverse into it — it’s different from read/write permissions on files. 755 keeps the directory owned and writable only by you, while still letting other users (like www-data) pass through it to reach the socket.
Test the configuration for syntax errors:
sudo nginx -t If it passes, restart Nginx to apply the changes:
sudo systemctl restart nginx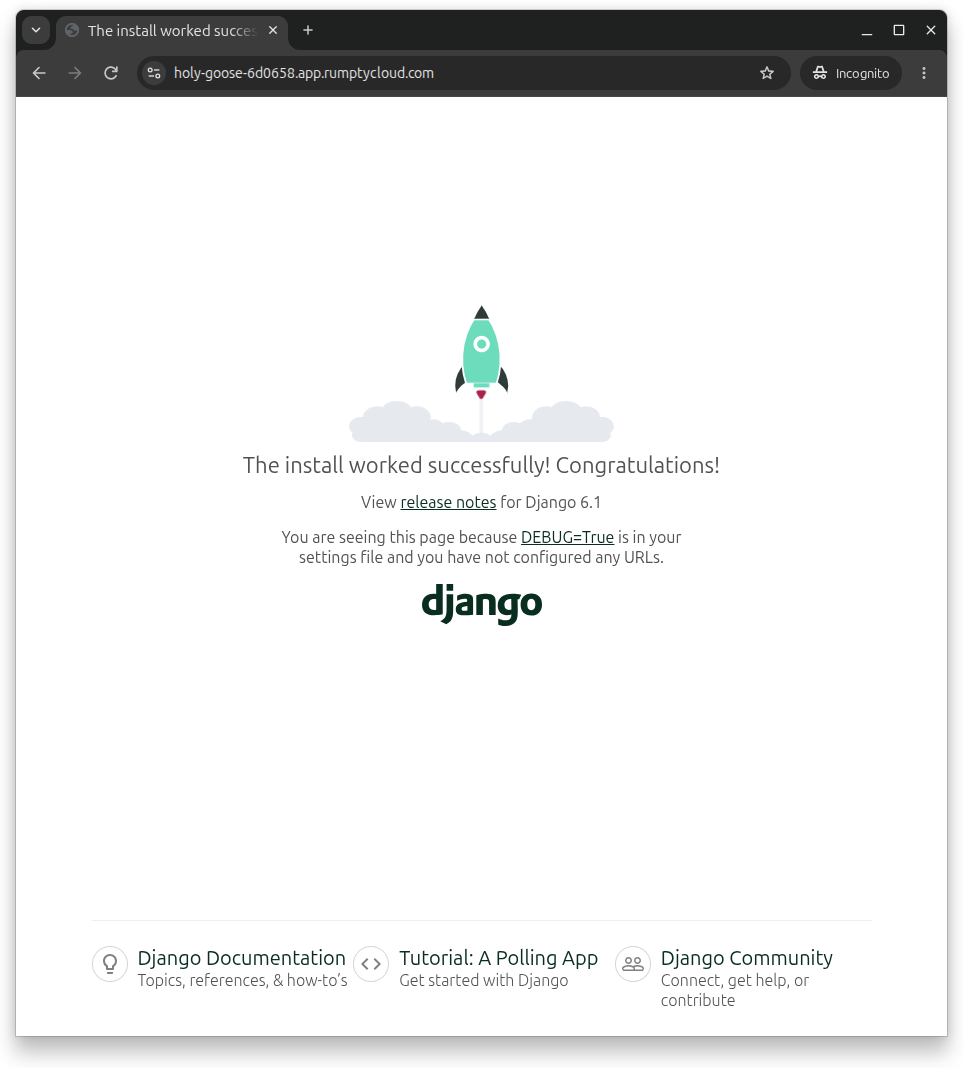
Troubleshooting
If something isn’t working after all this setup, here’s where to look.
Gunicorn / your Django app
Check the systemd service logs:
sudo journalctl -u my_django_appThis shows Gunicorn’s startup output and any errors your Django app throws — missing environment variables, import errors, database connection failures, etc. Add -f to follow the log live (sudo journalctl -u my_django_app -f) while you reload the page, which is often the fastest way to catch an error as it happens.
You can also check whether the service is even running at all:
sudo systemctl status my_django_appNginx
Nginx keeps separate logs for errors and access:
sudo tail -f /var/log/nginx/error.logIf you set up custom log paths in your site config (as we did earlier — /var/log/nginx/django_project/error.log), check those instead. A 502 Bad Gateway here almost always means Nginx can’t reach the Gunicorn socket — usually a wrong socket path or a permissions issue (see the earlier section on directory permissions).
A few common issues worth checking, in order:
- Socket path mismatch — the proxy_pass in your Nginx config and the –bind value in your systemd service file must point to the exact same socket path.
- Permissions — make sure the directories leading to the socket are traversable by www-data (covered earlier), and that the socket file itself isn’t owned in a way that blocks Nginx from connecting.
- Config not reloaded — if you edit the systemd service file, run sudo systemctl daemon-reload before restarting the service, or your changes won’t take effect.
- ALLOWED_HOSTS — Django will return a 400 error if your domain isn’t listed in ALLOWED_HOSTS in settings.py.
- Static files not showing — if the site loads but looks unstyled, you likely forgot to run python manage.py collectstatic so Nginx has files to serve from the /static/ directory.